

Get notified by email when this product is in stock.
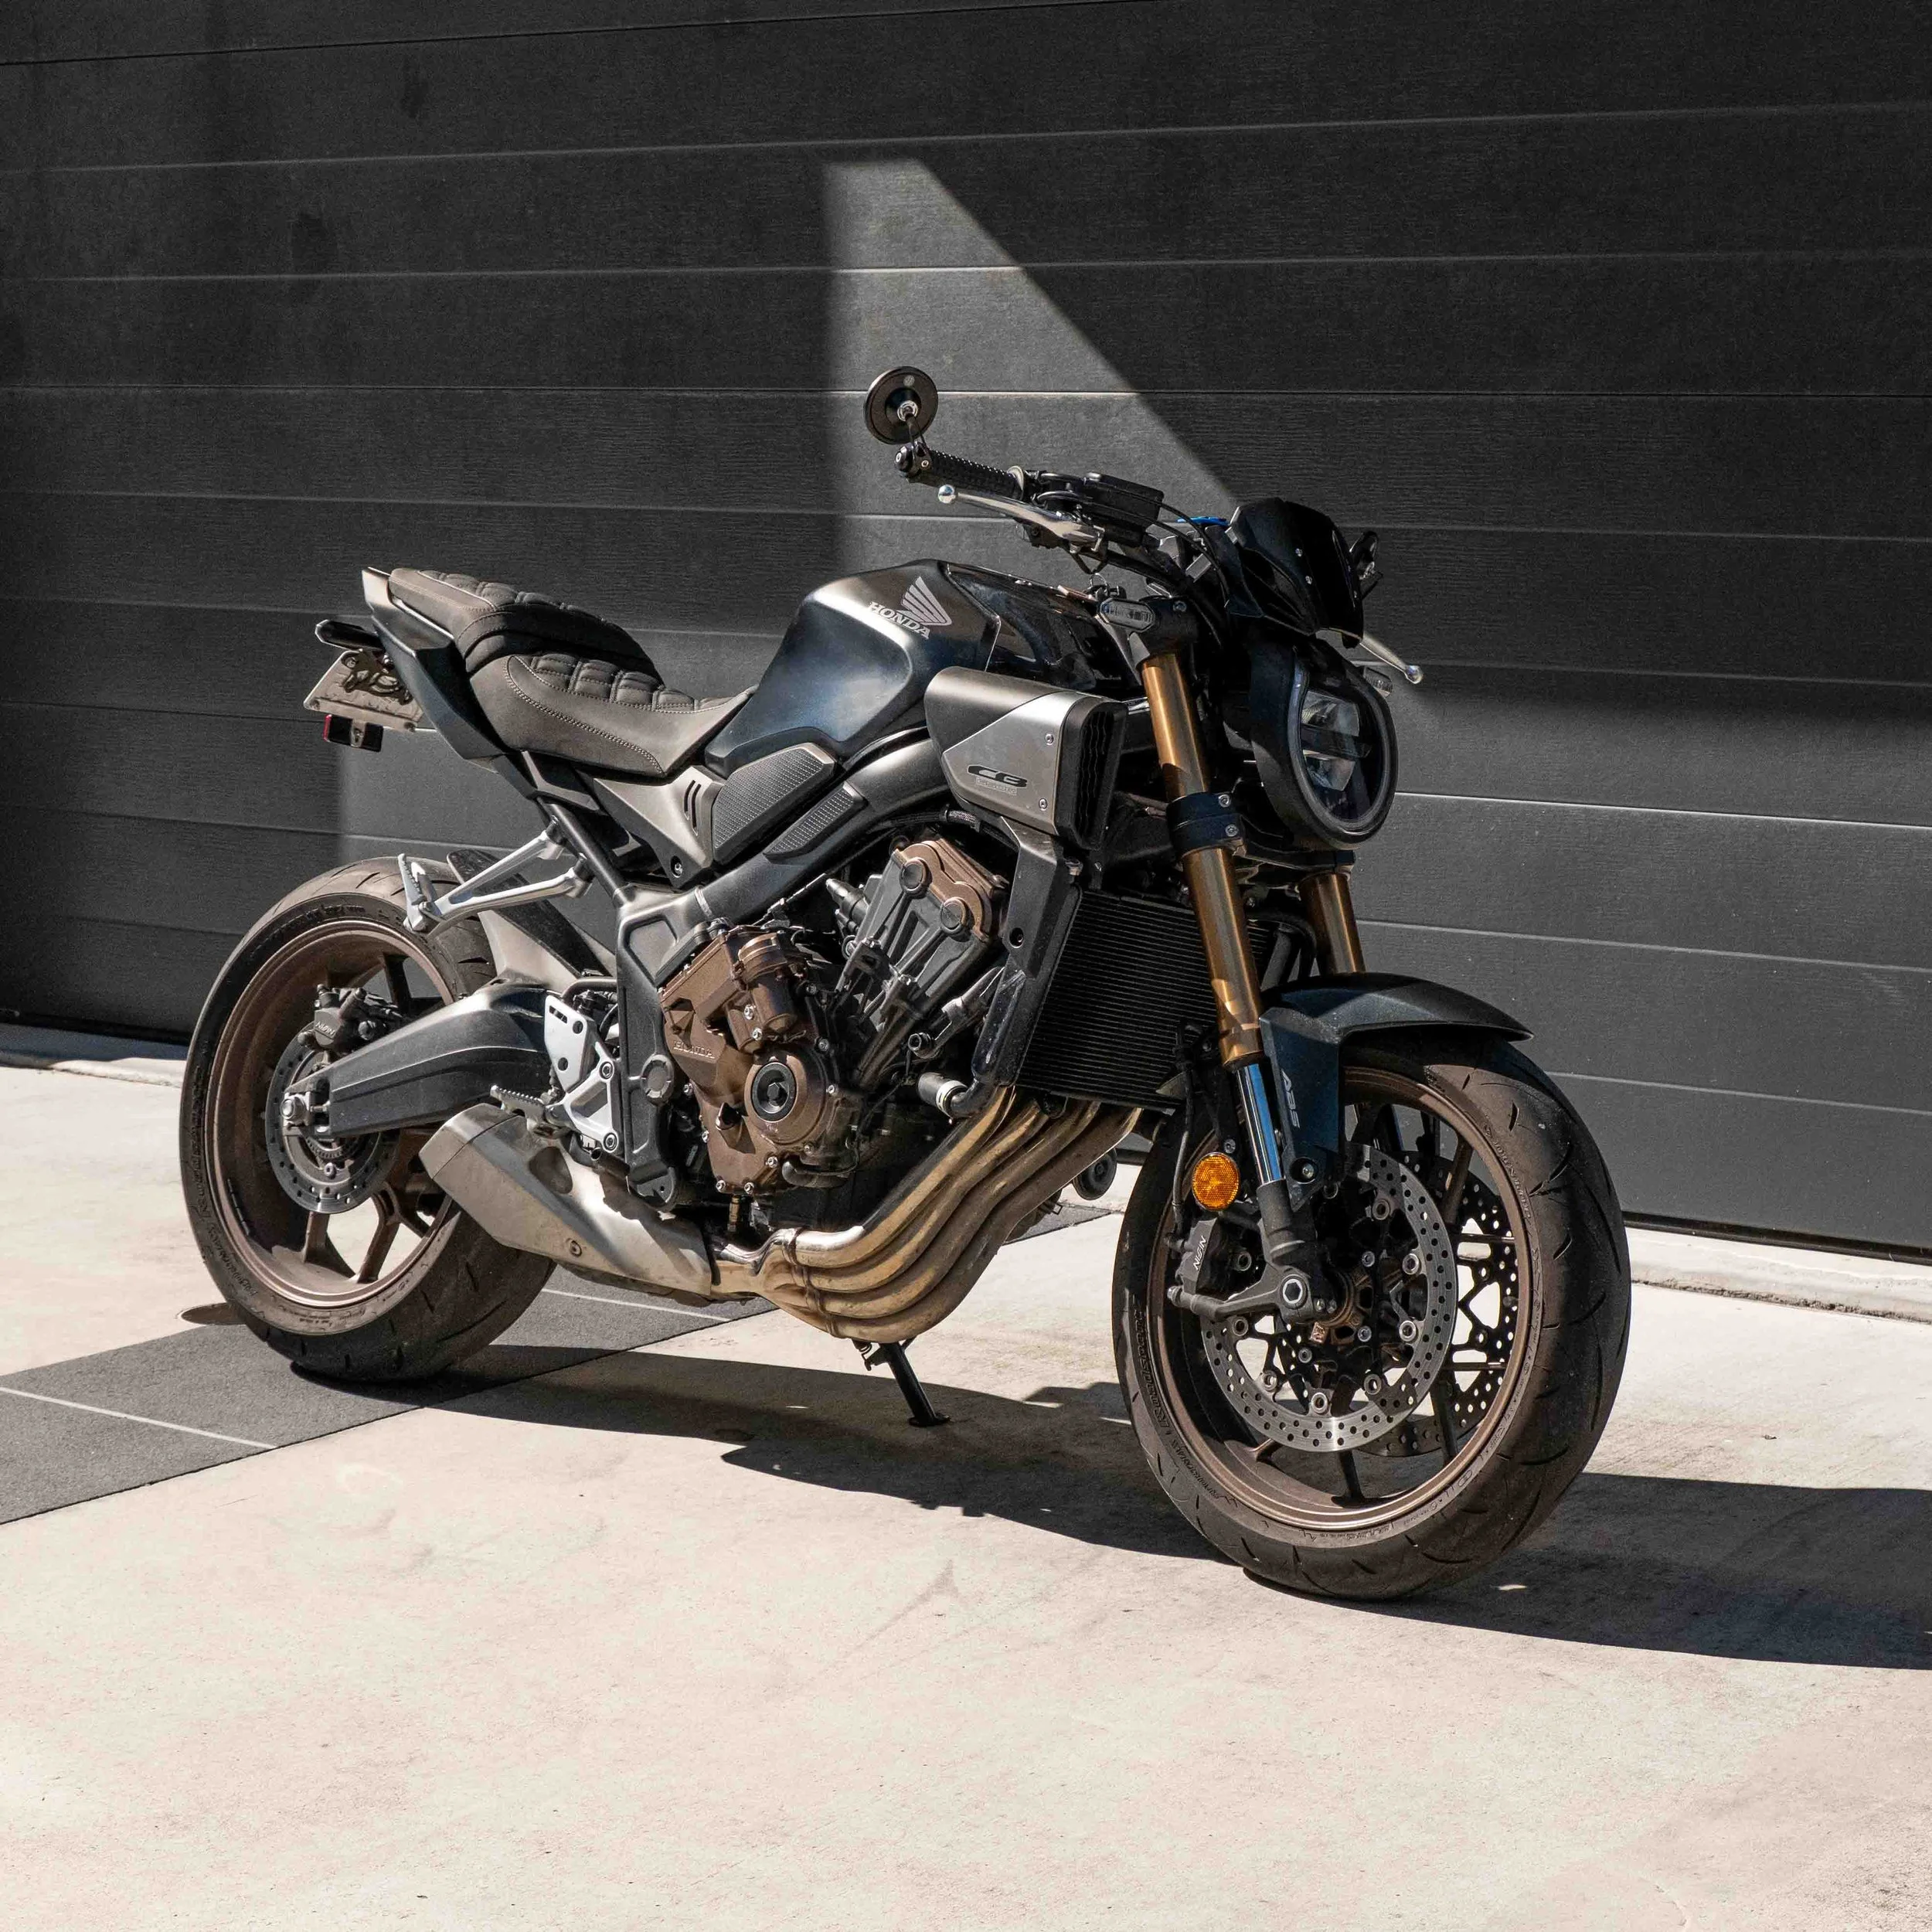
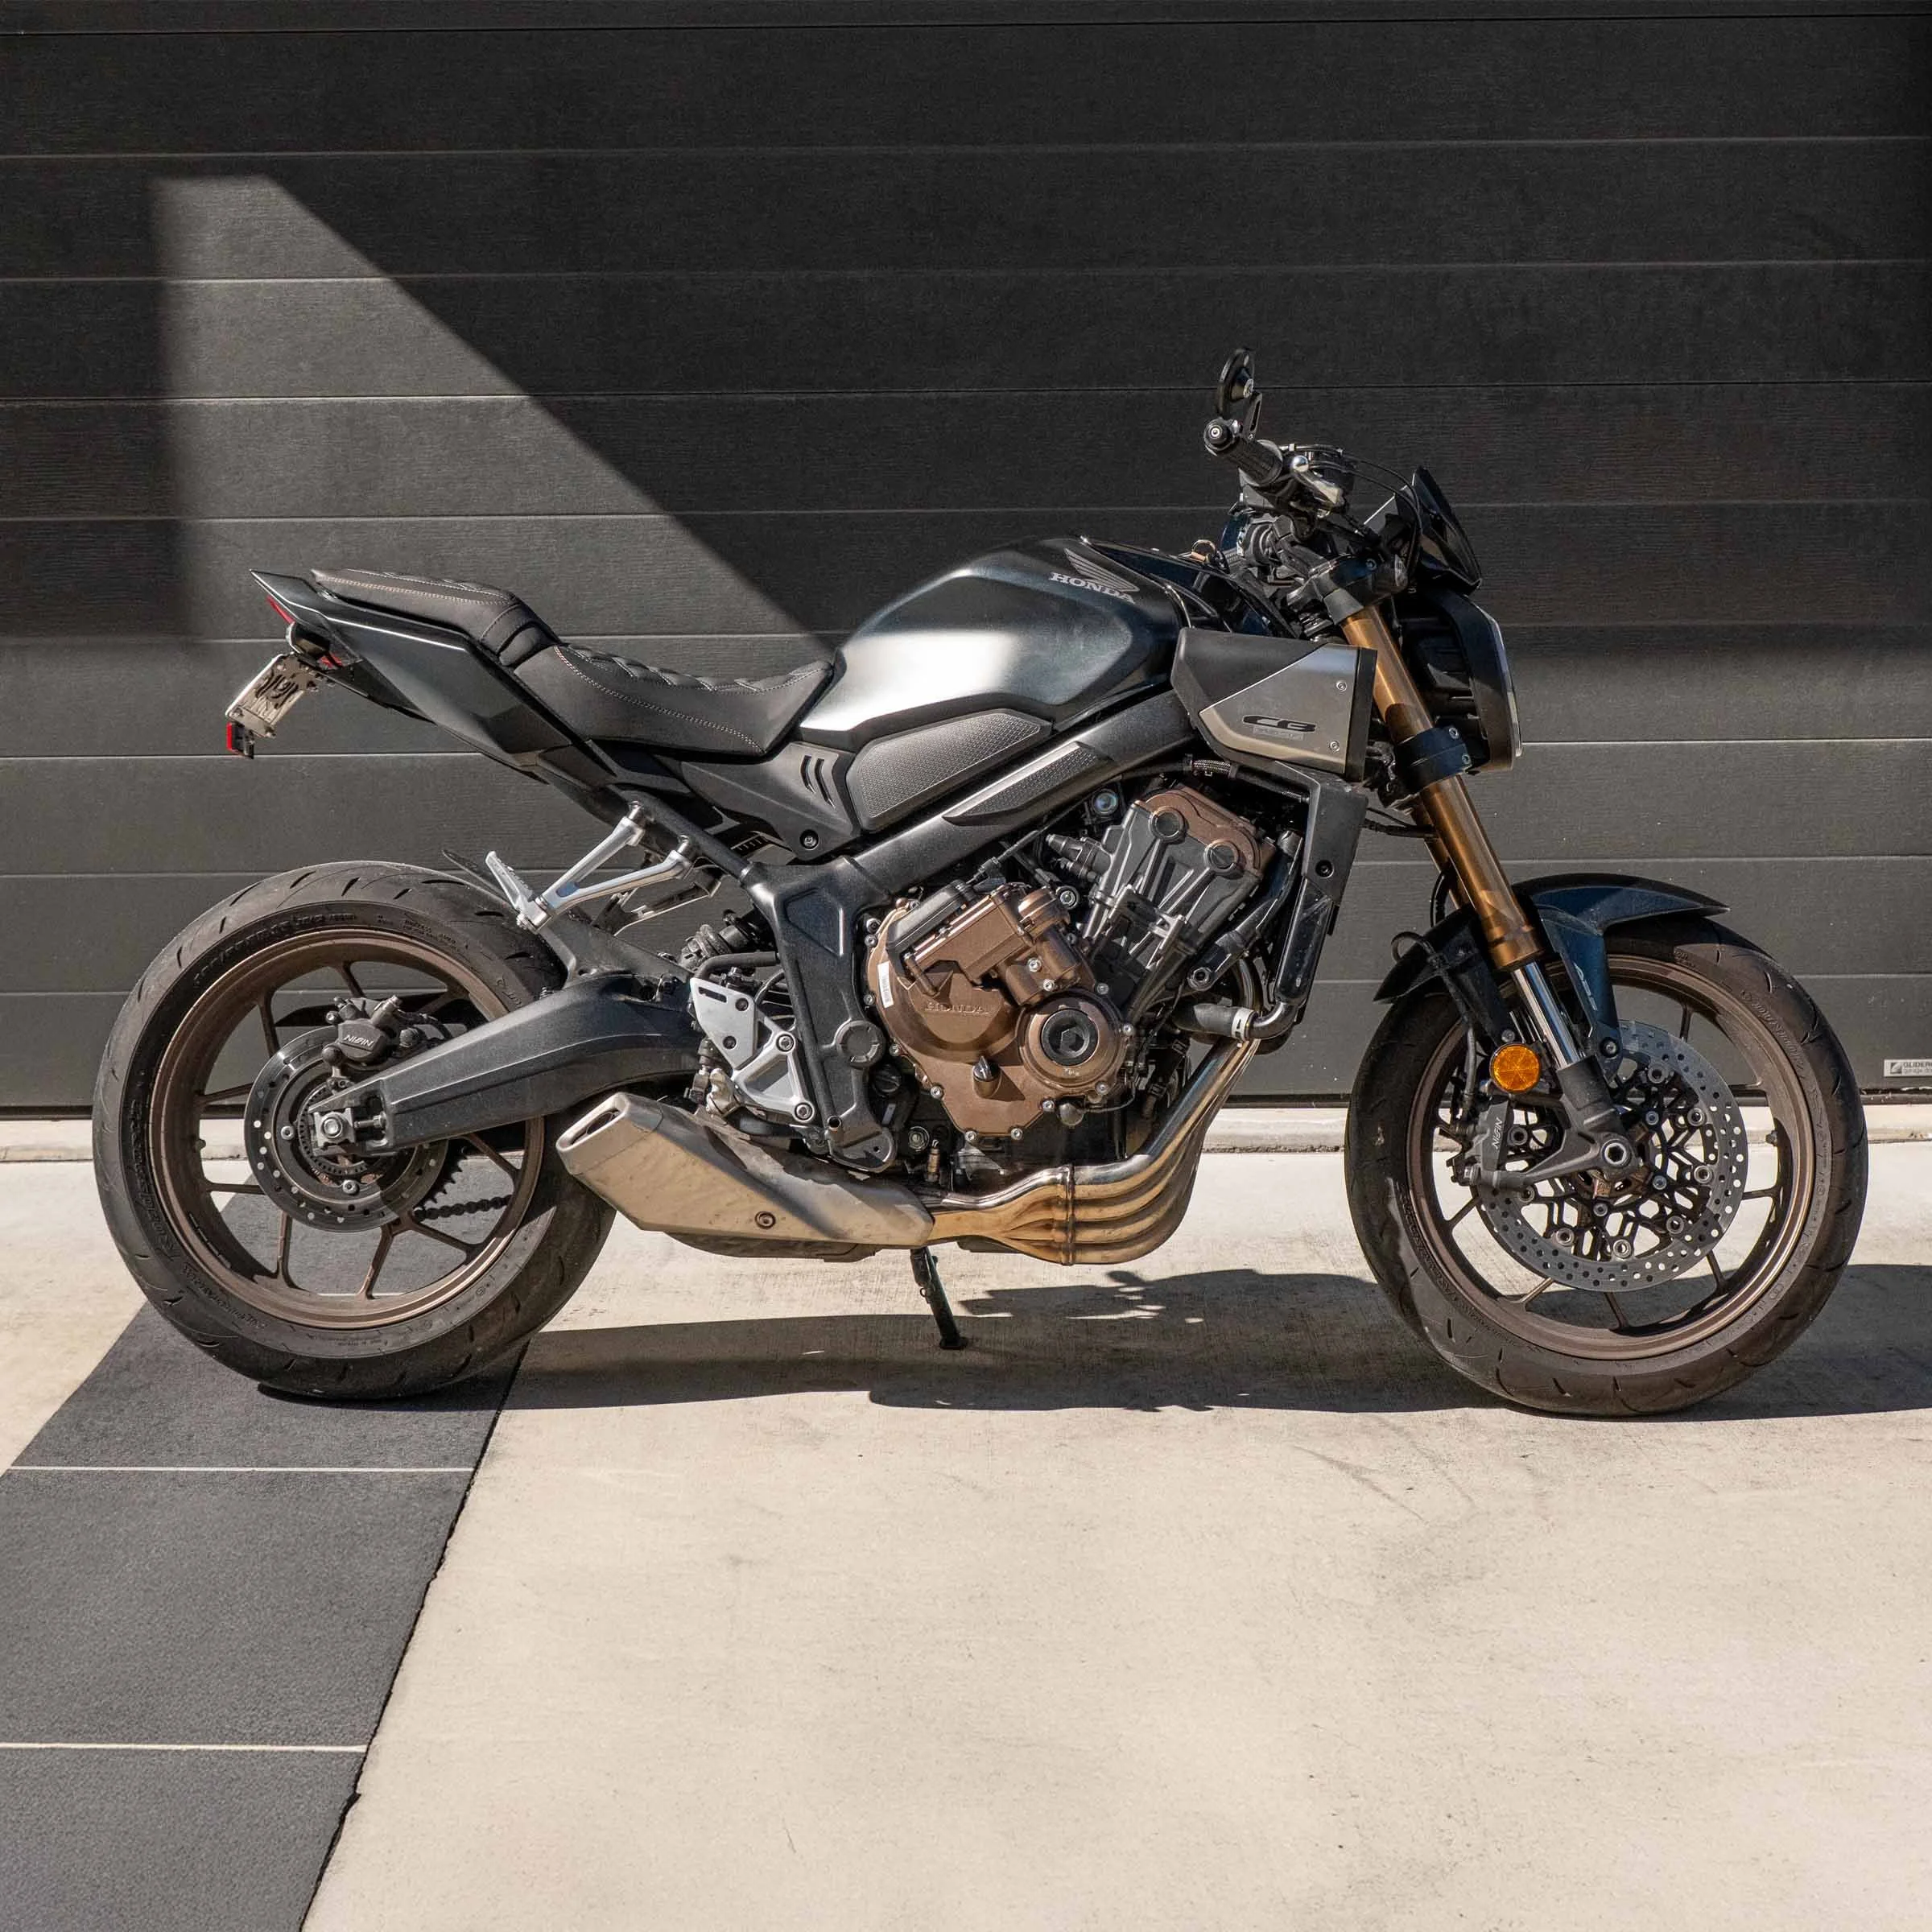
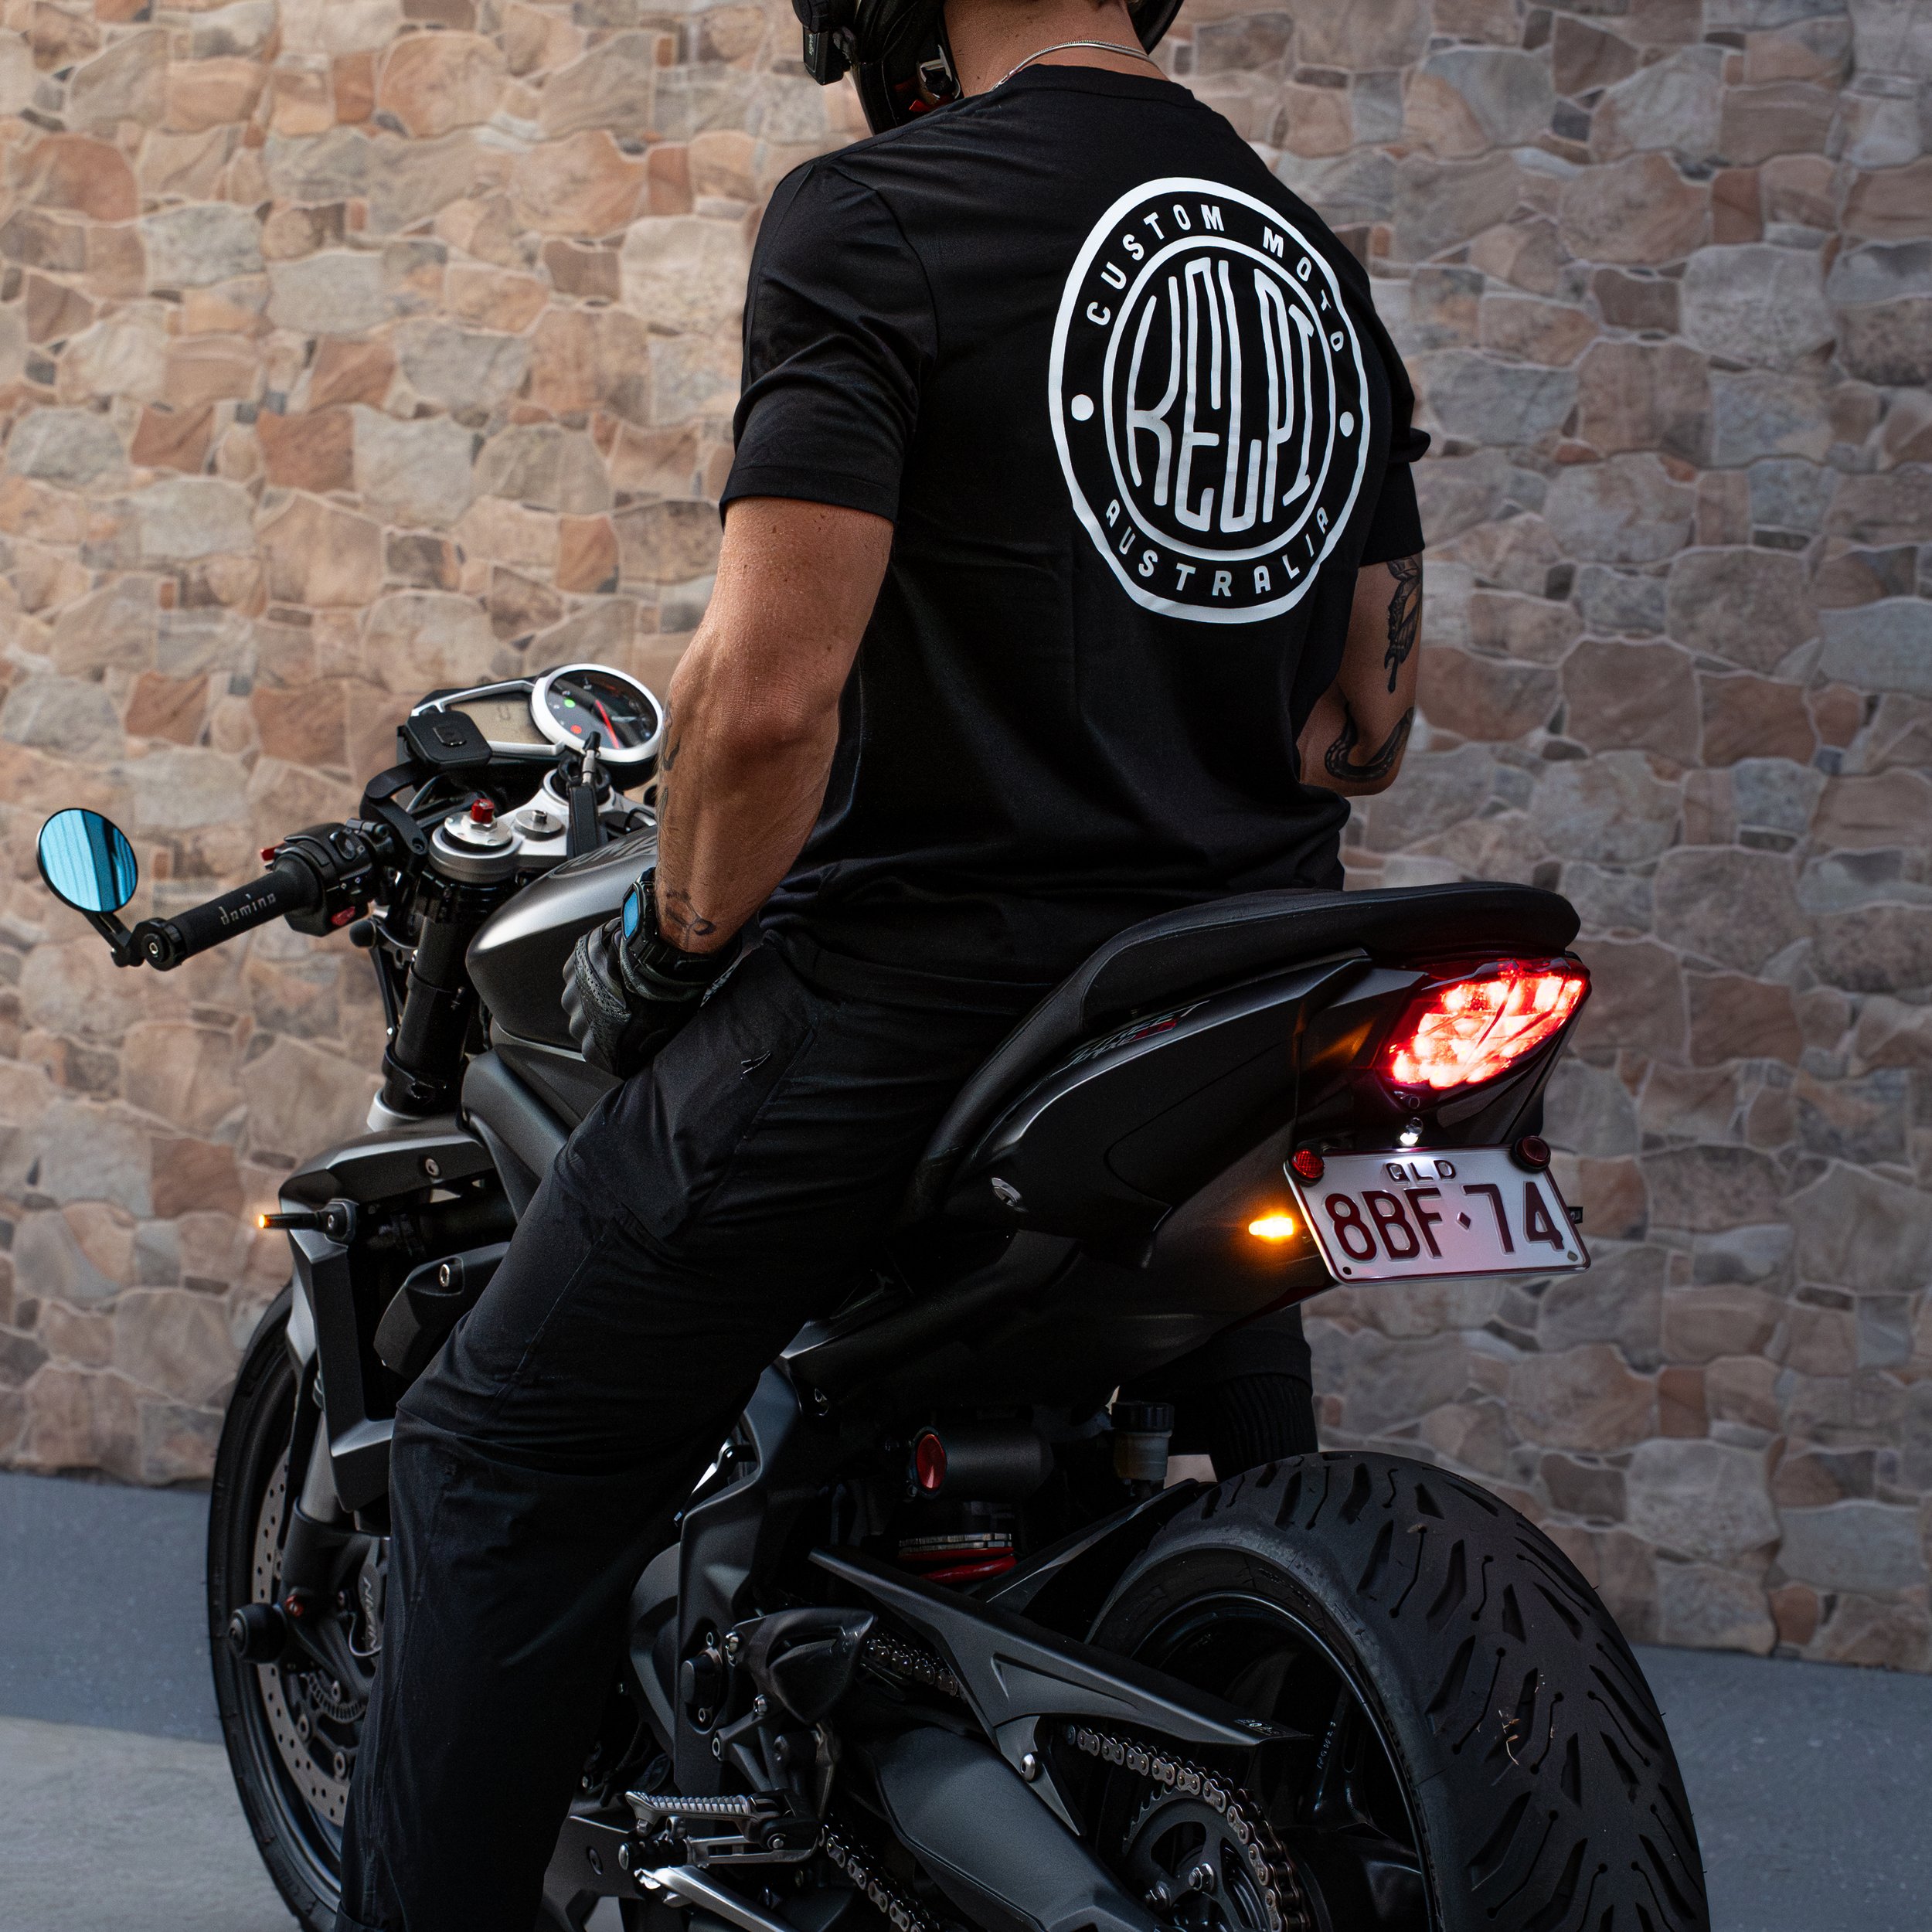
Performance Meets Precision for Honda’s Inline-Four Street Weapon
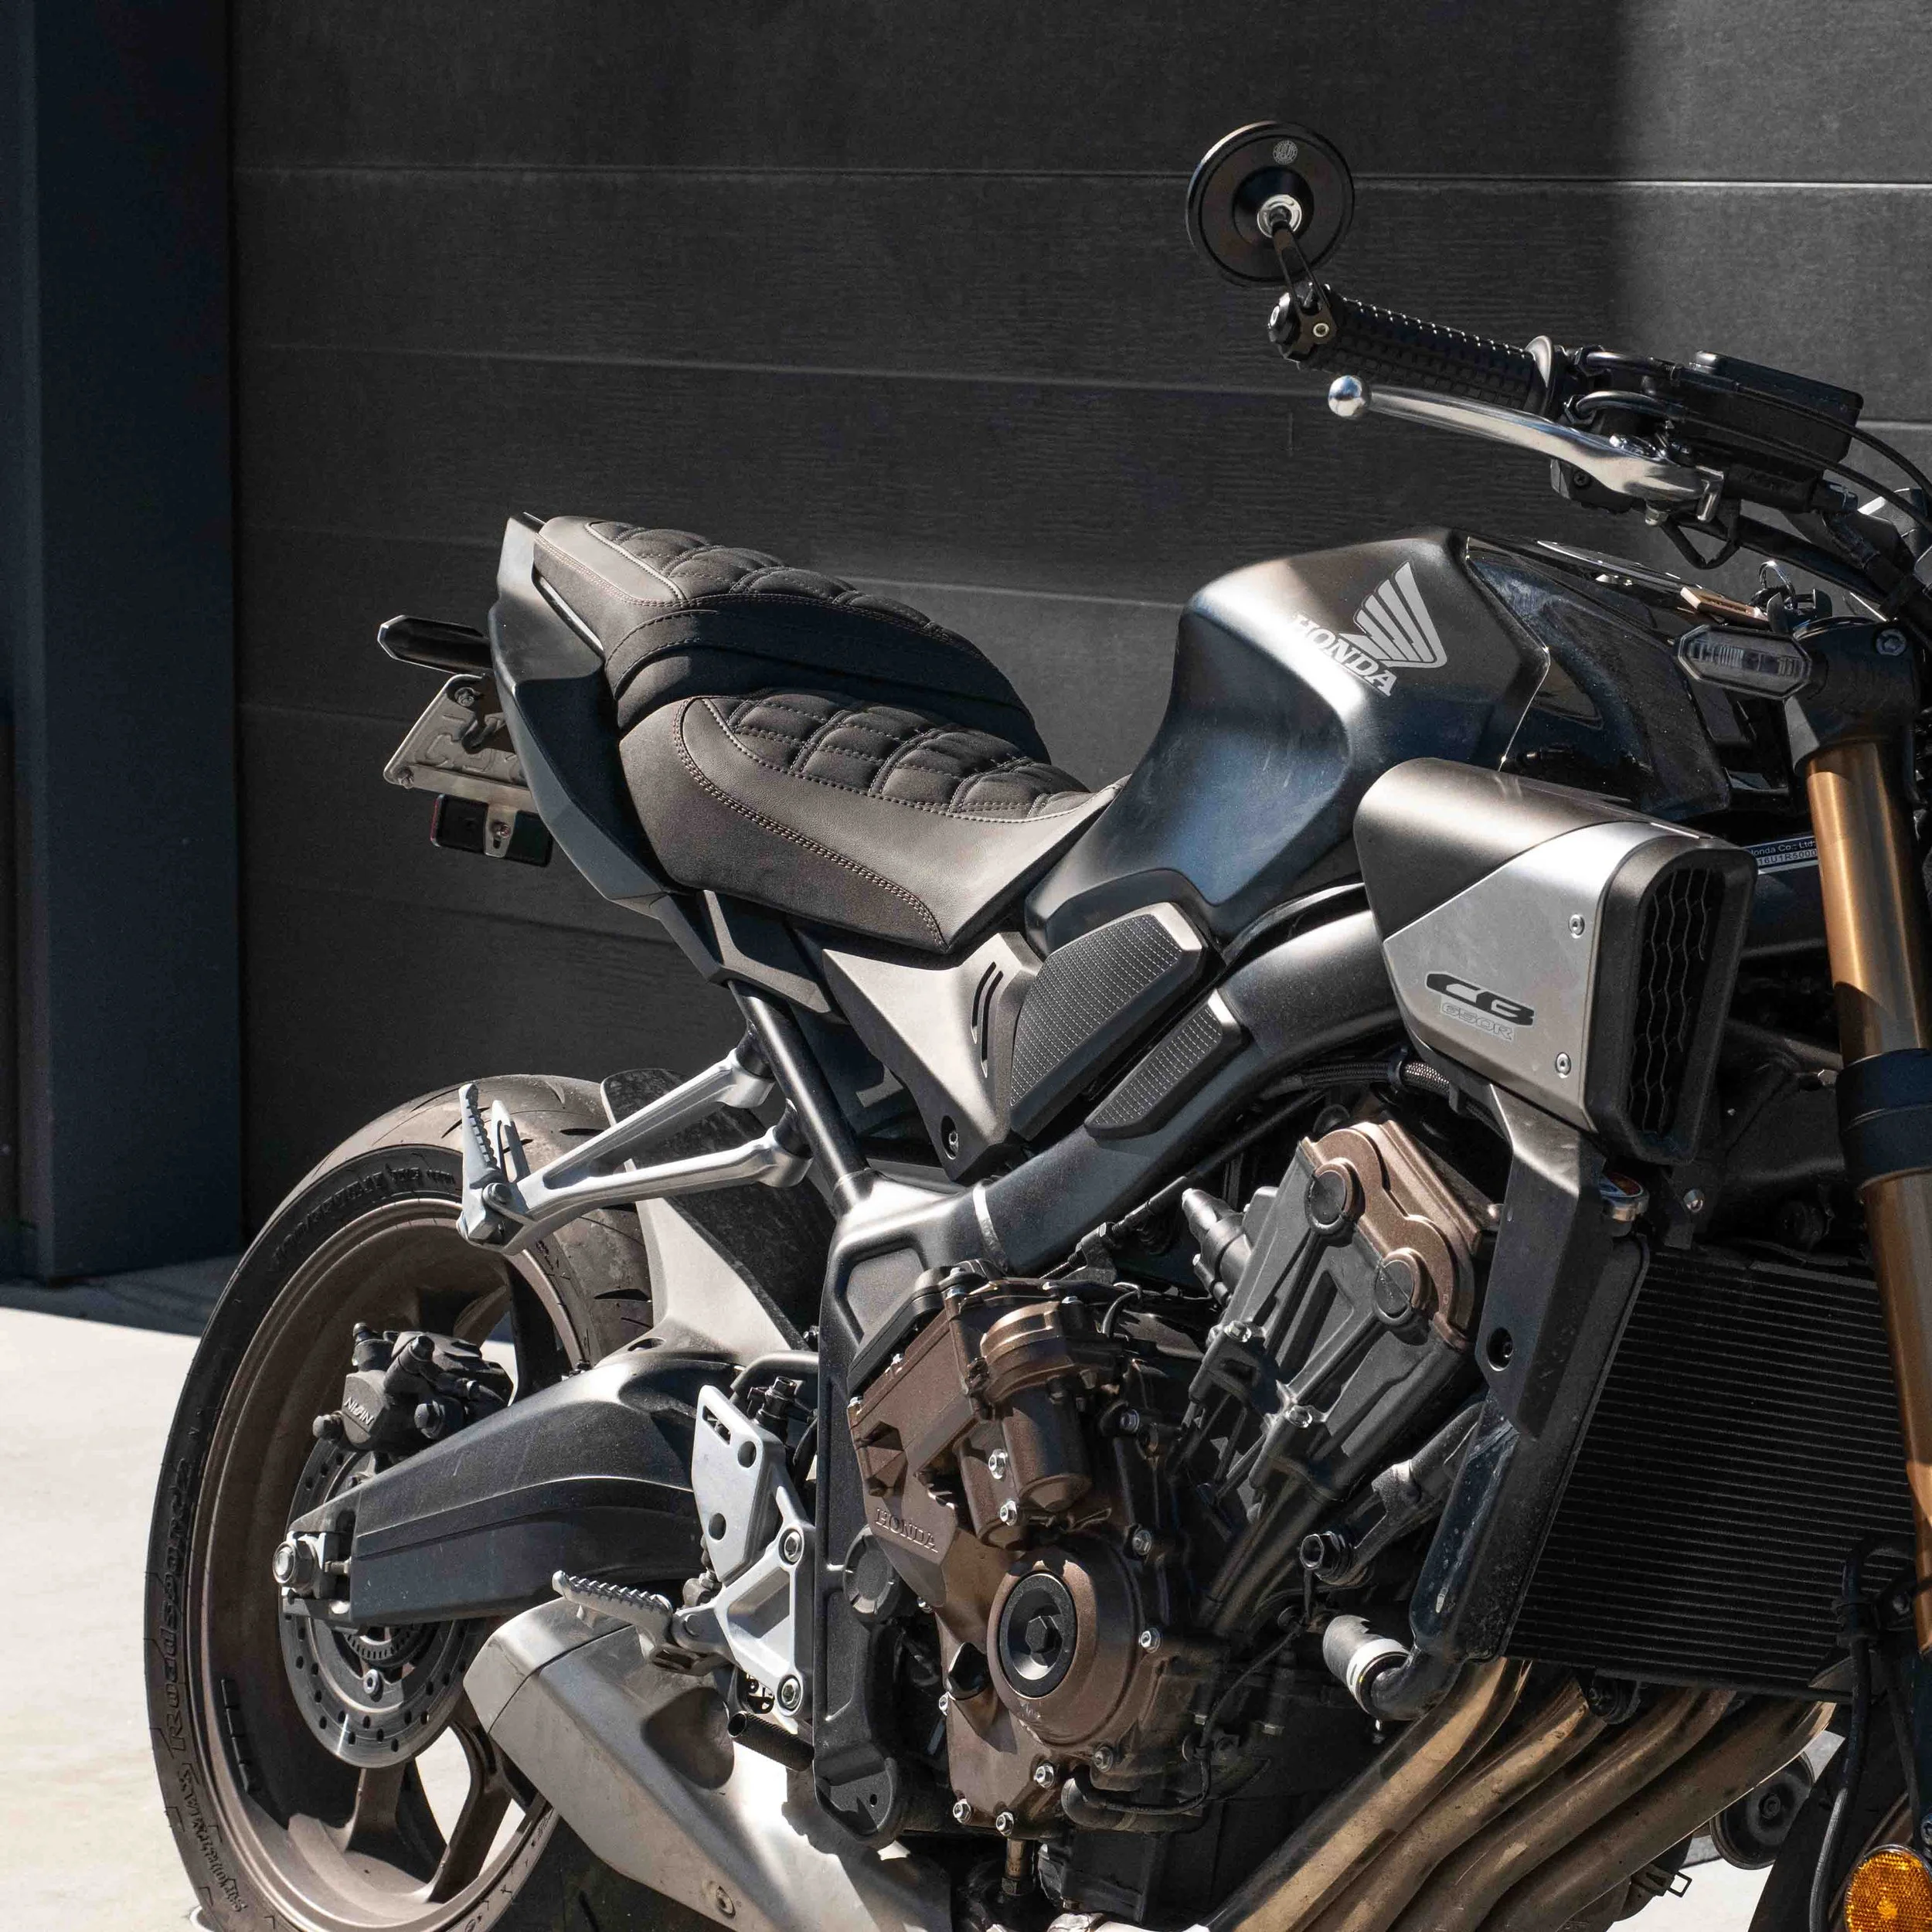
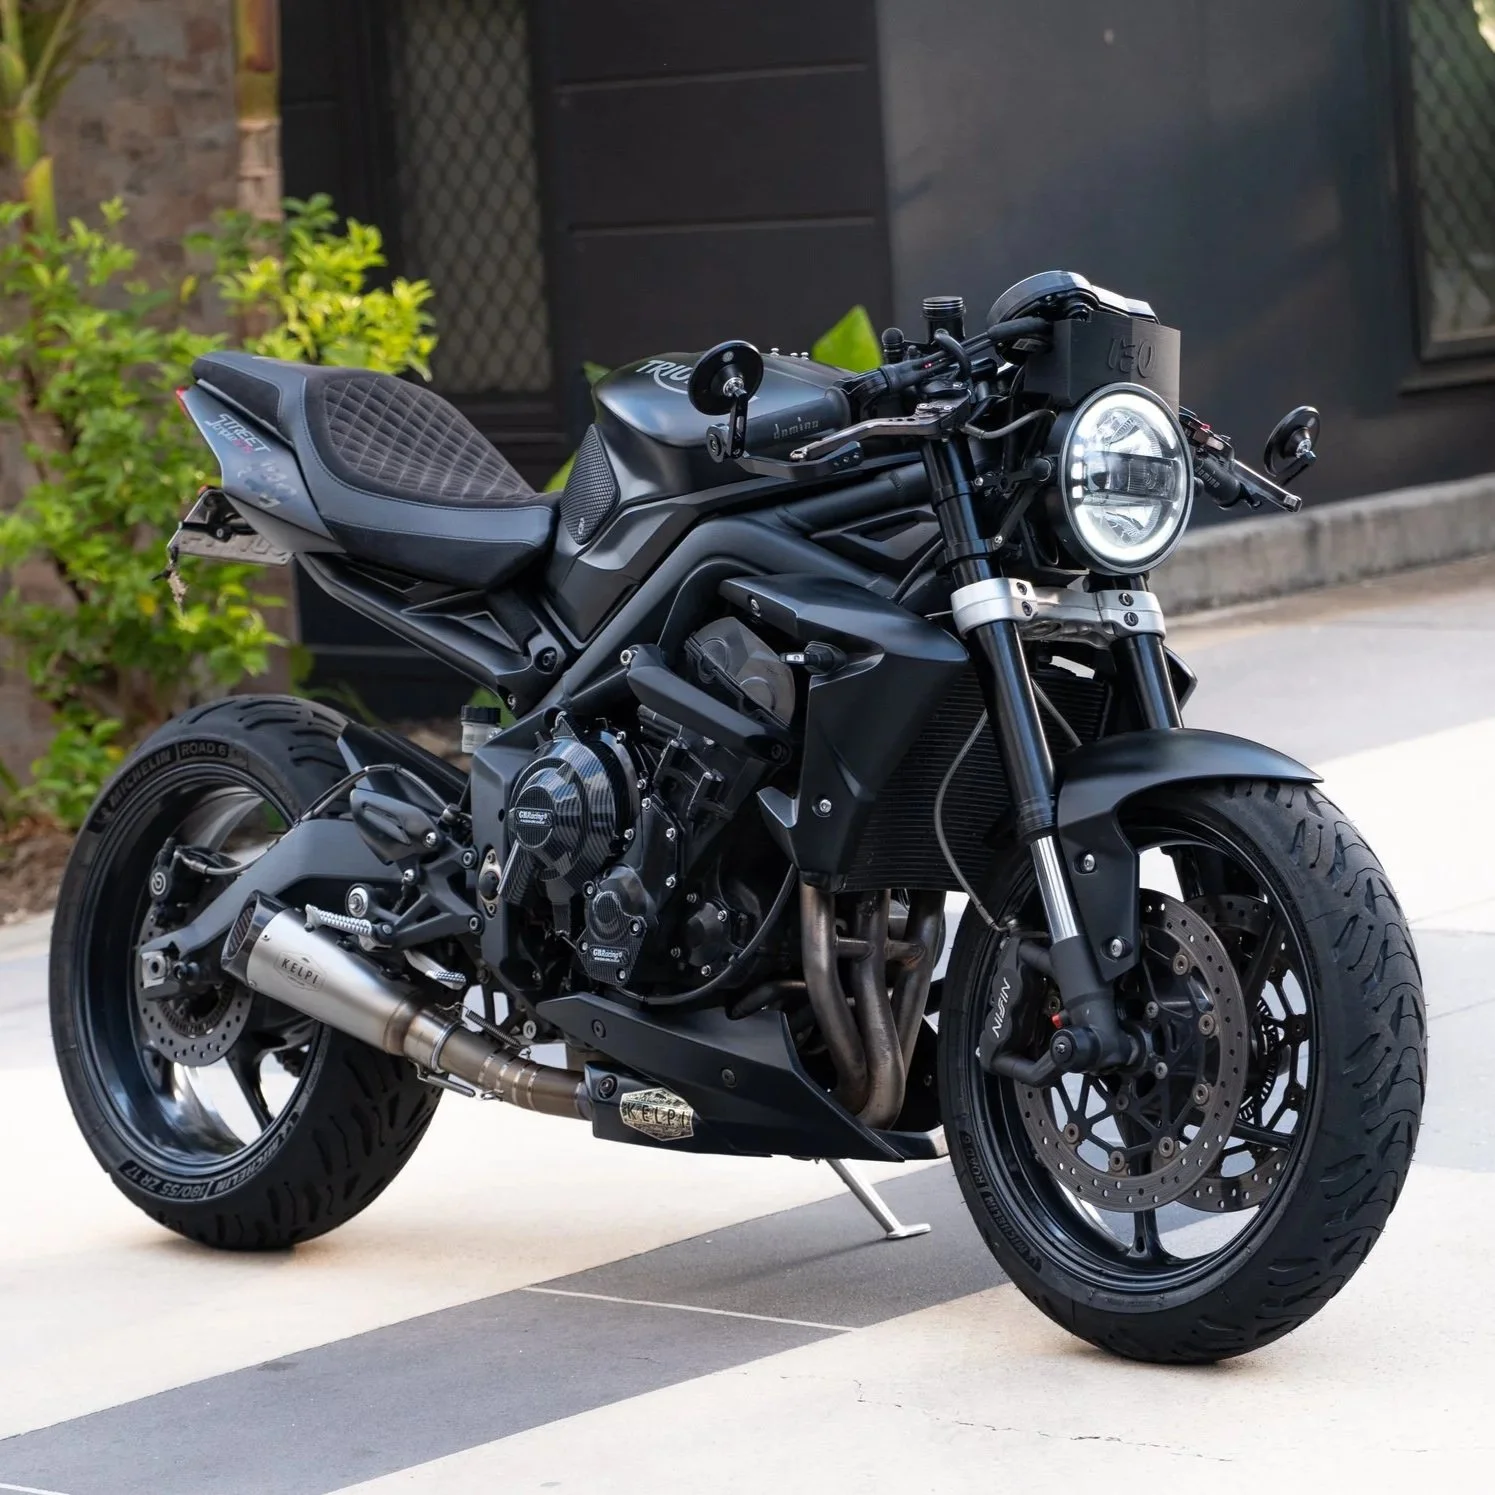
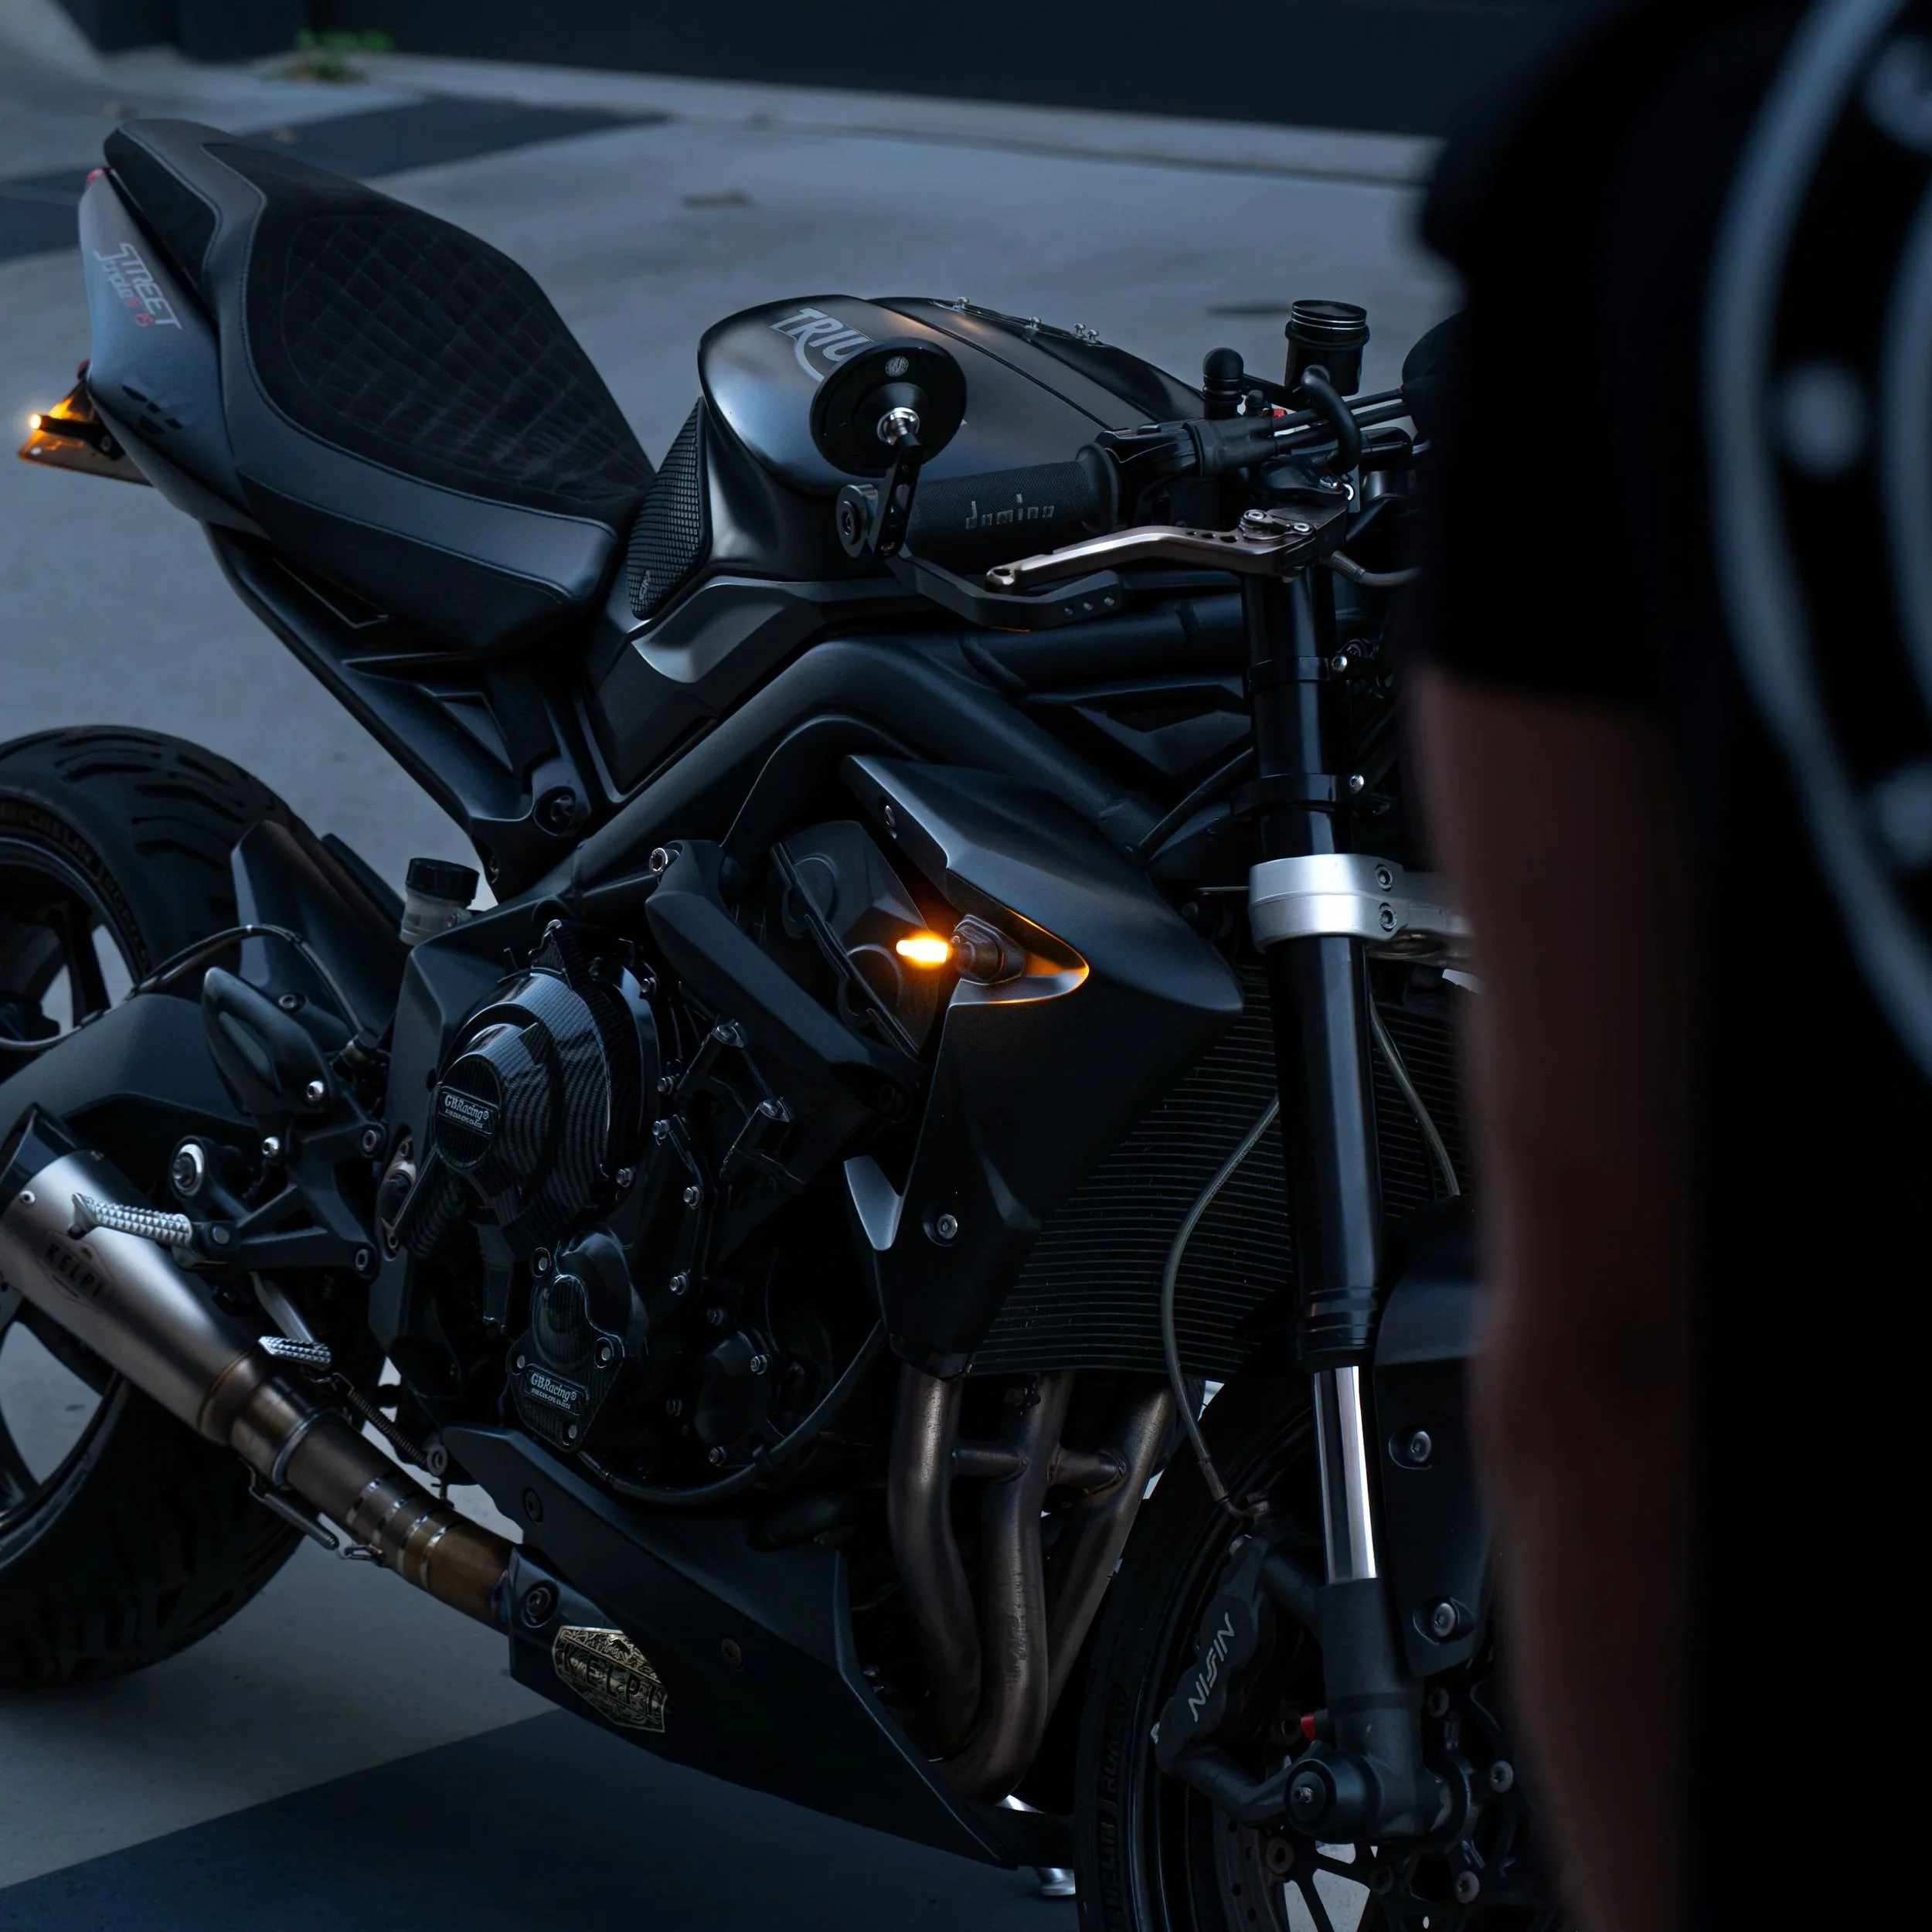
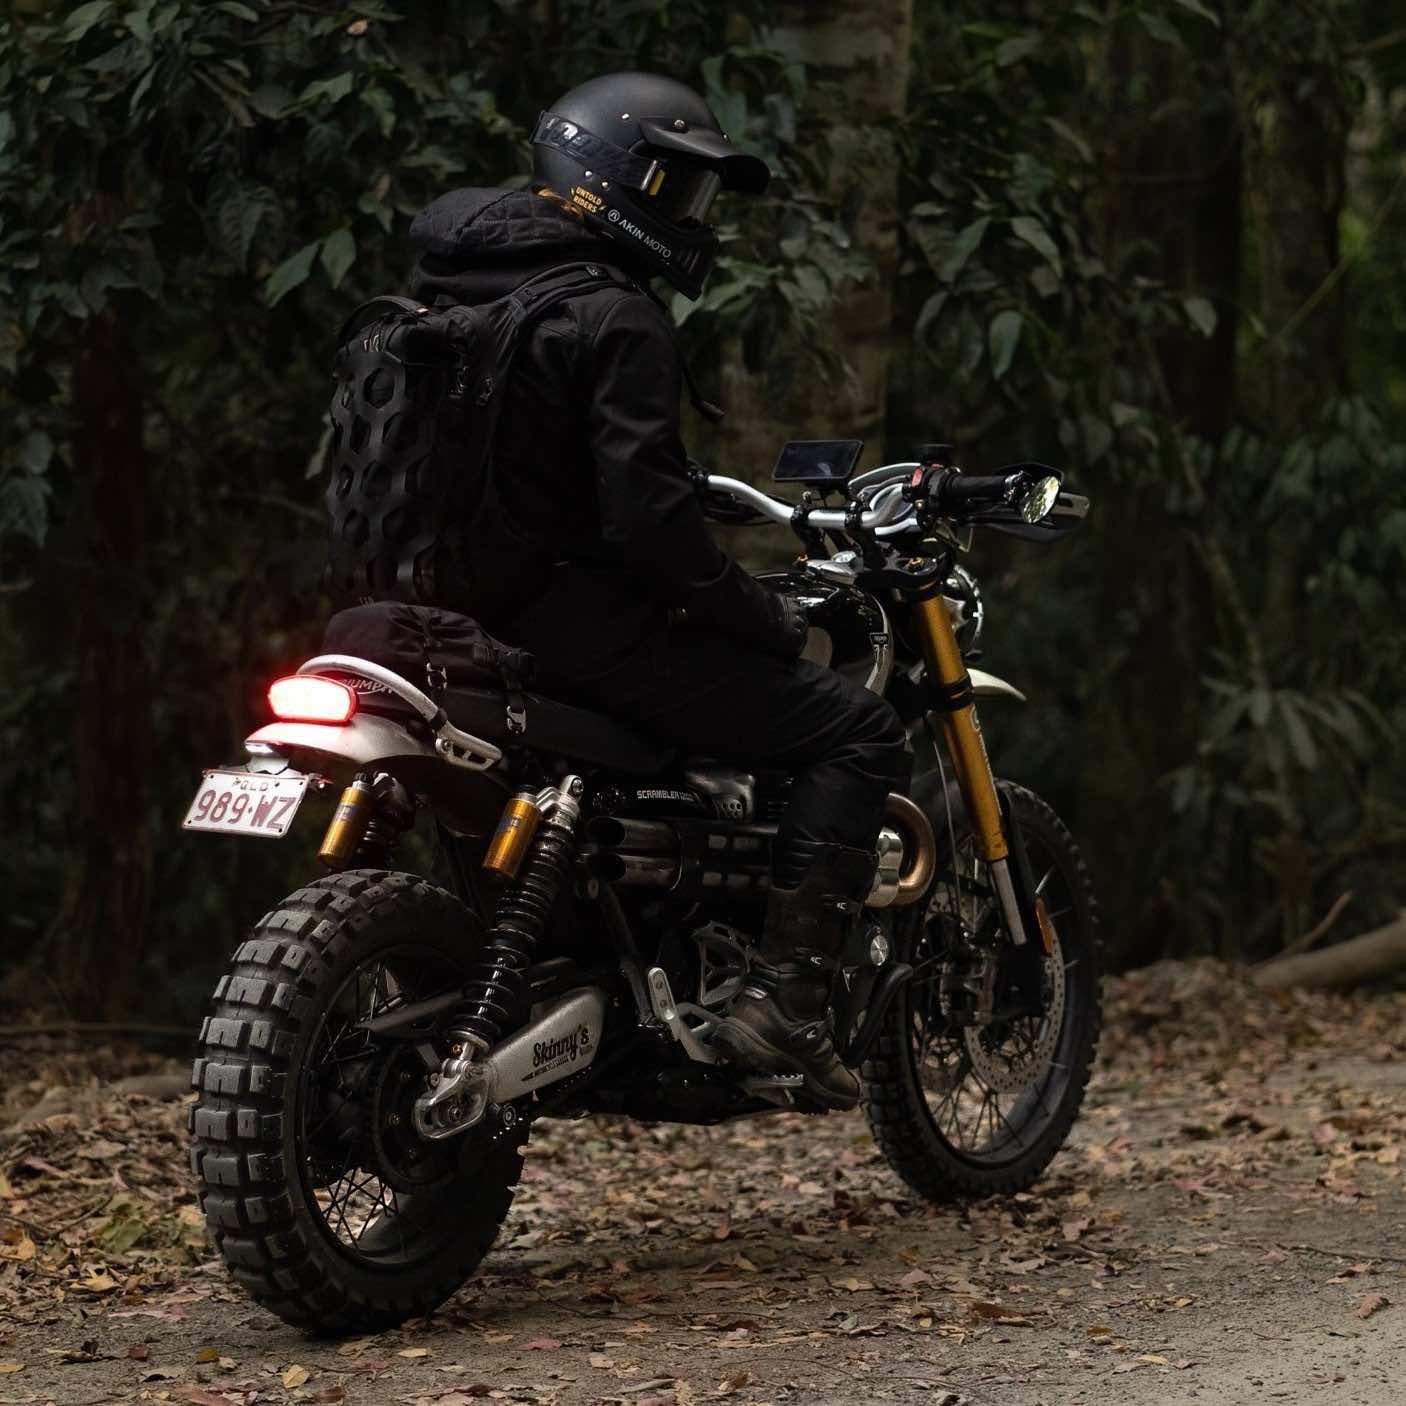
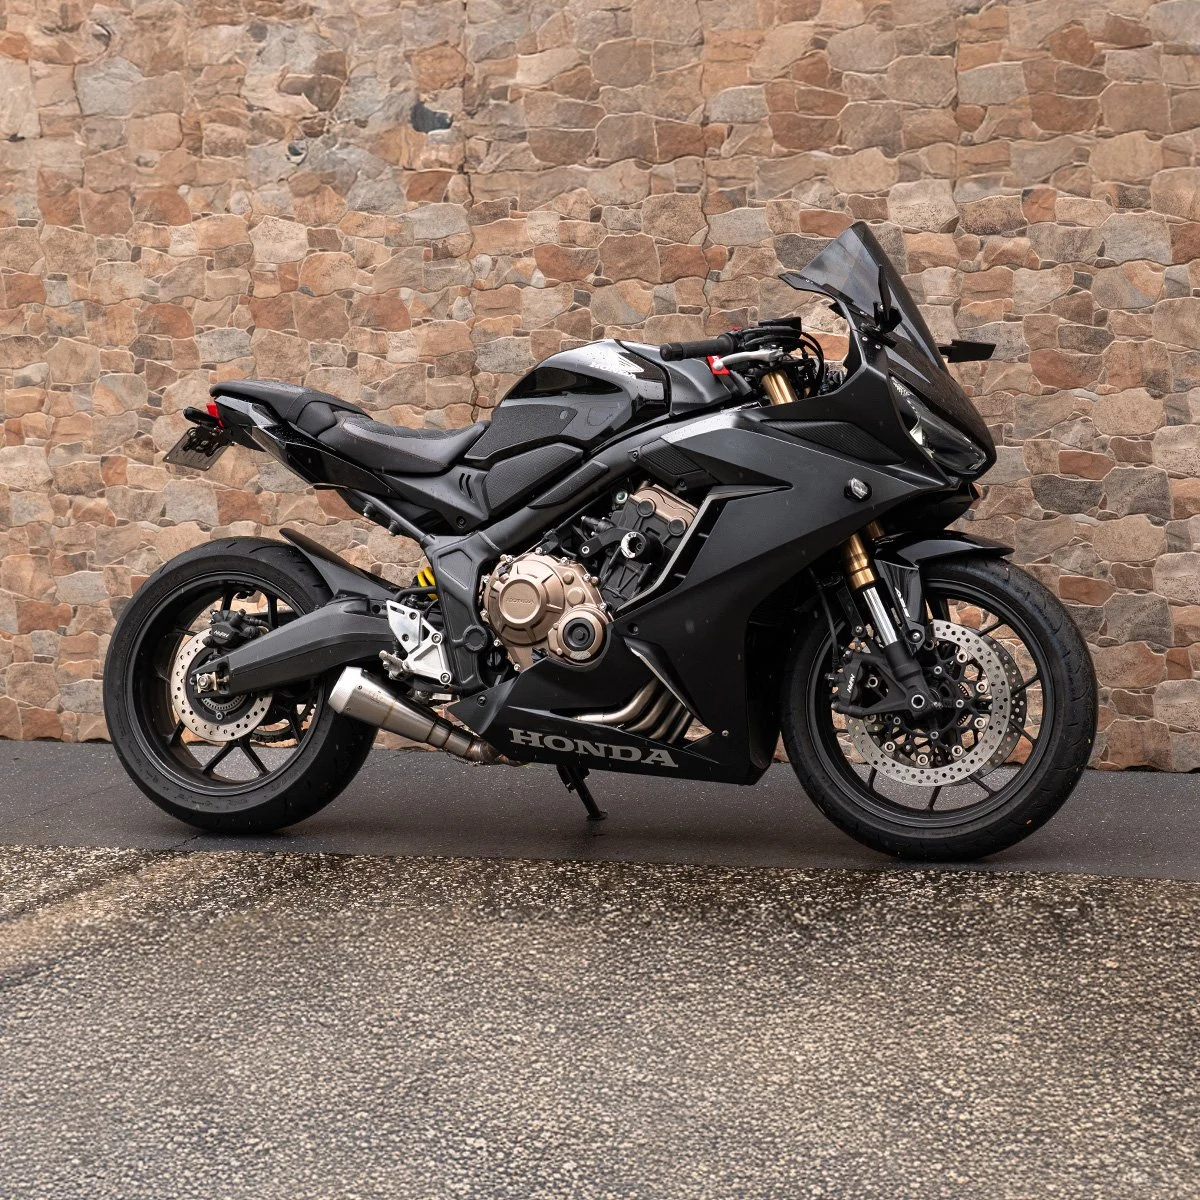
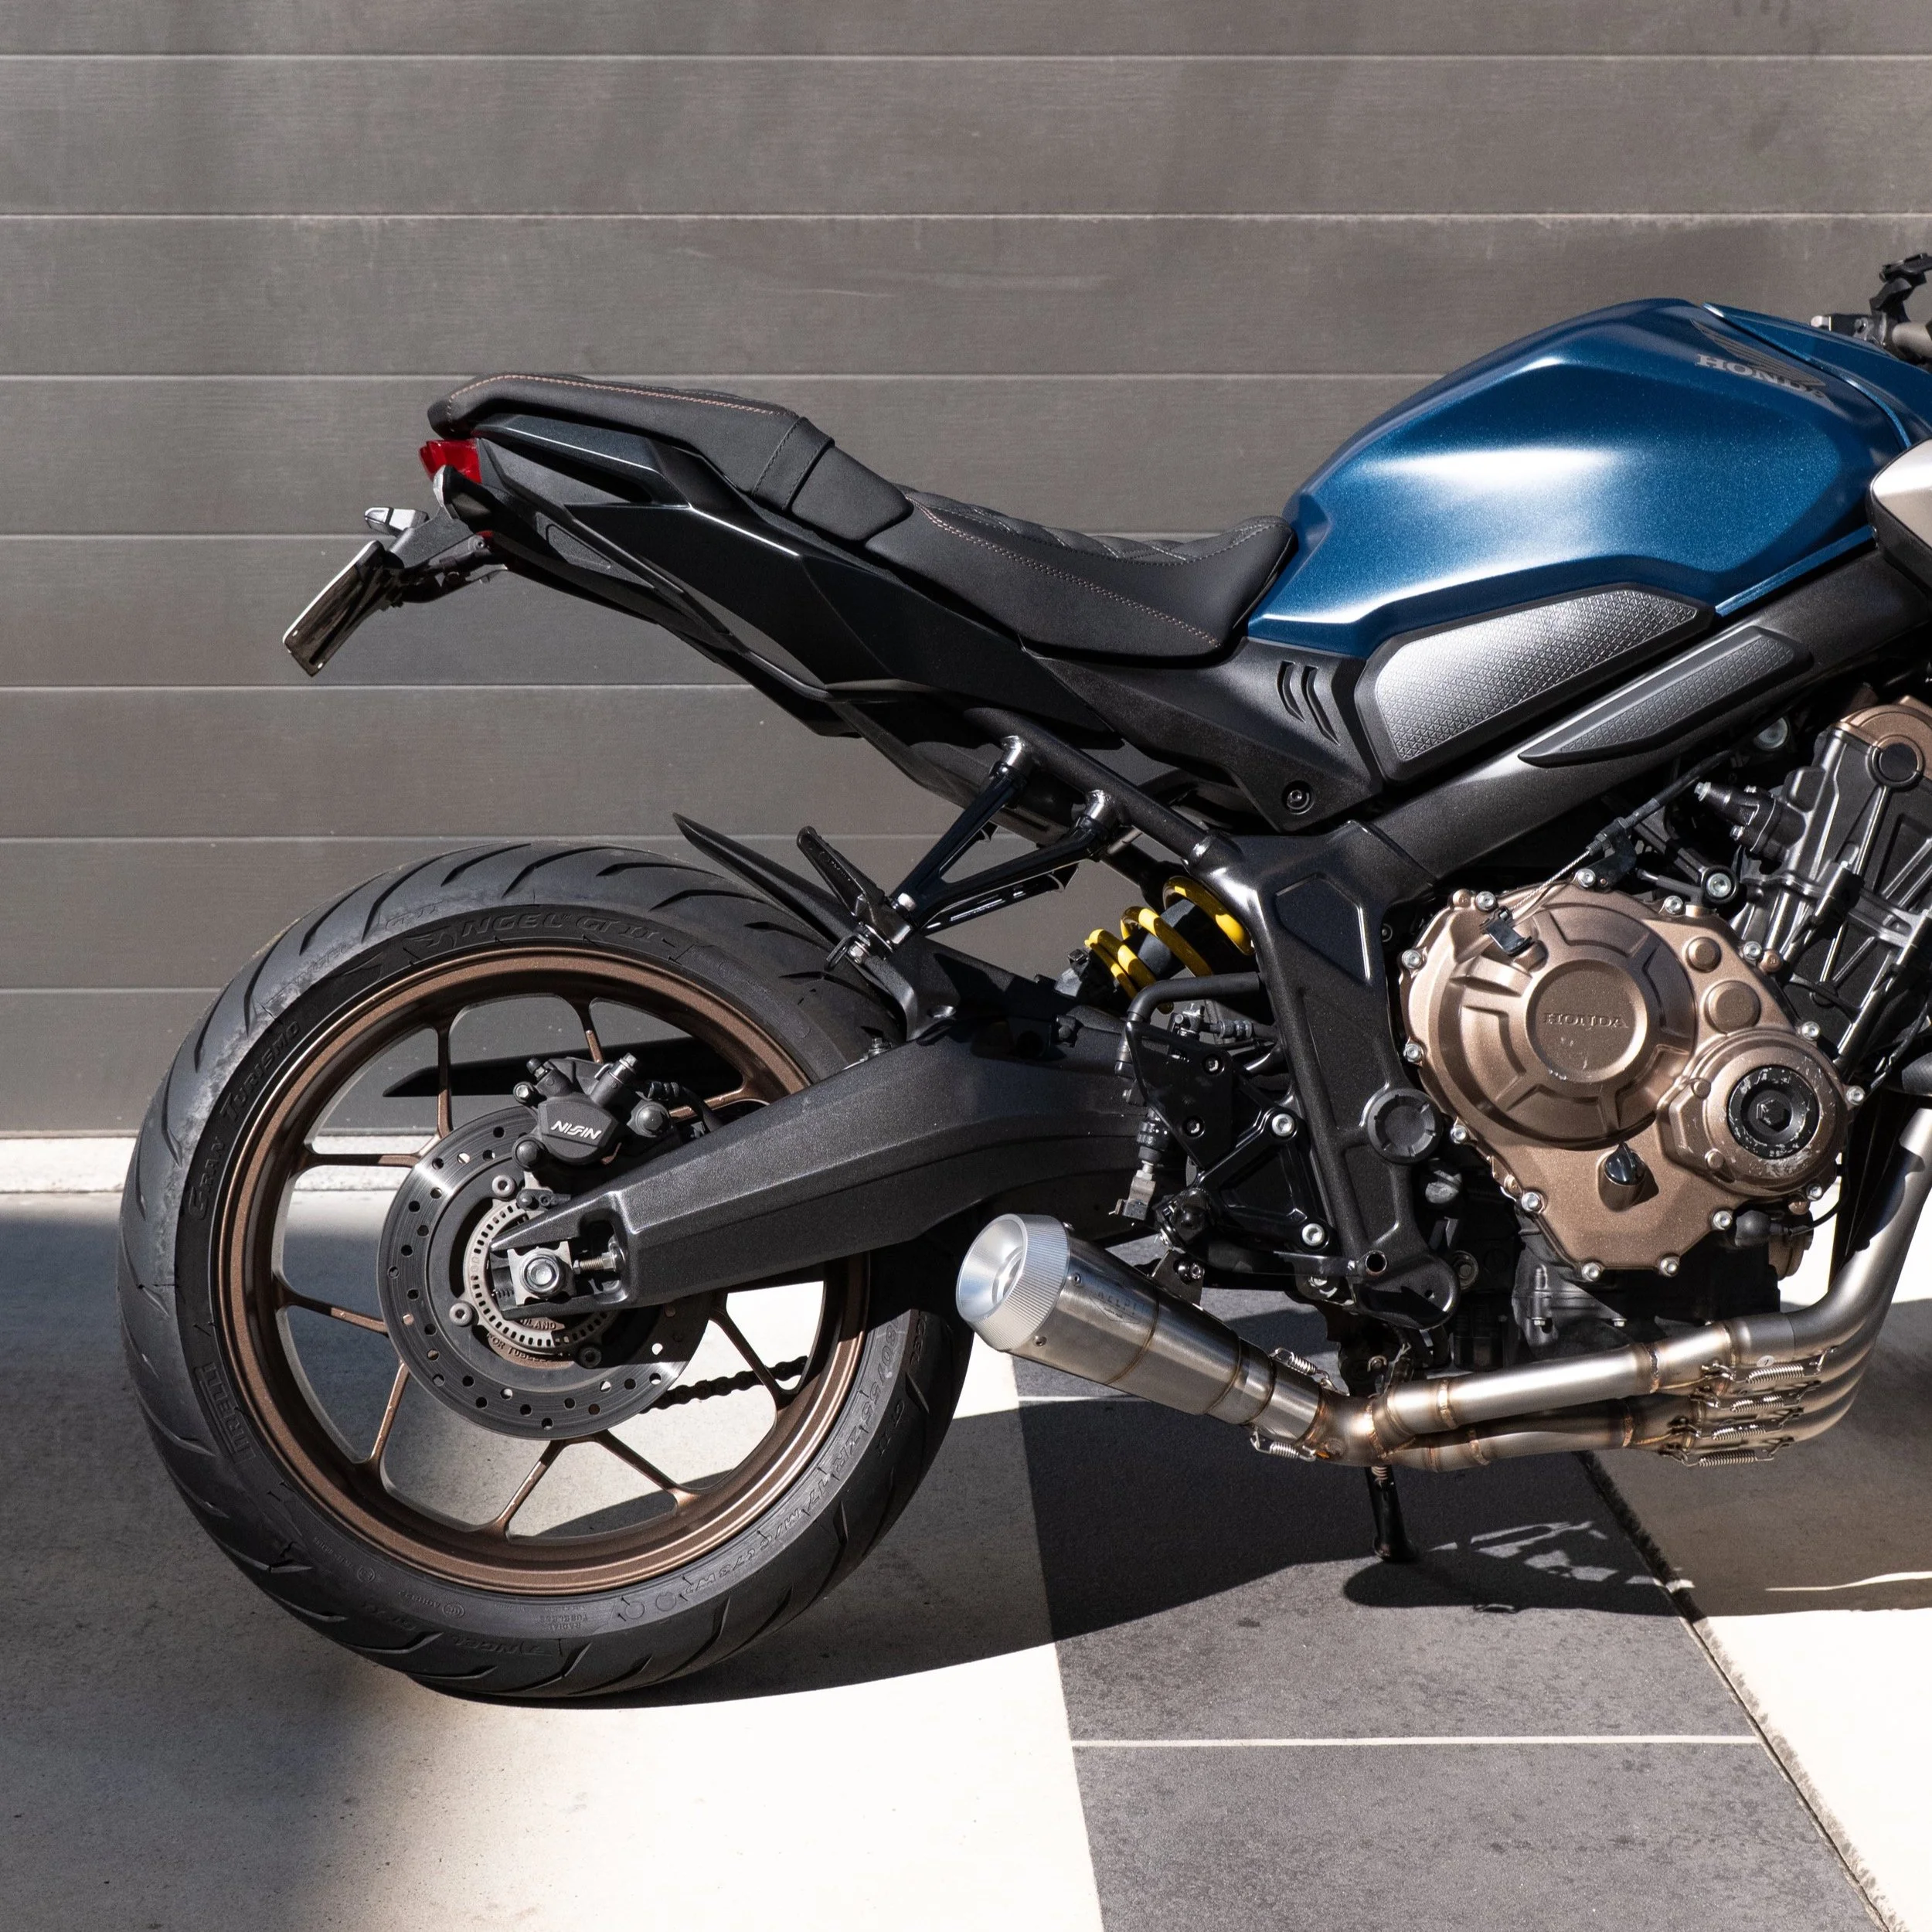
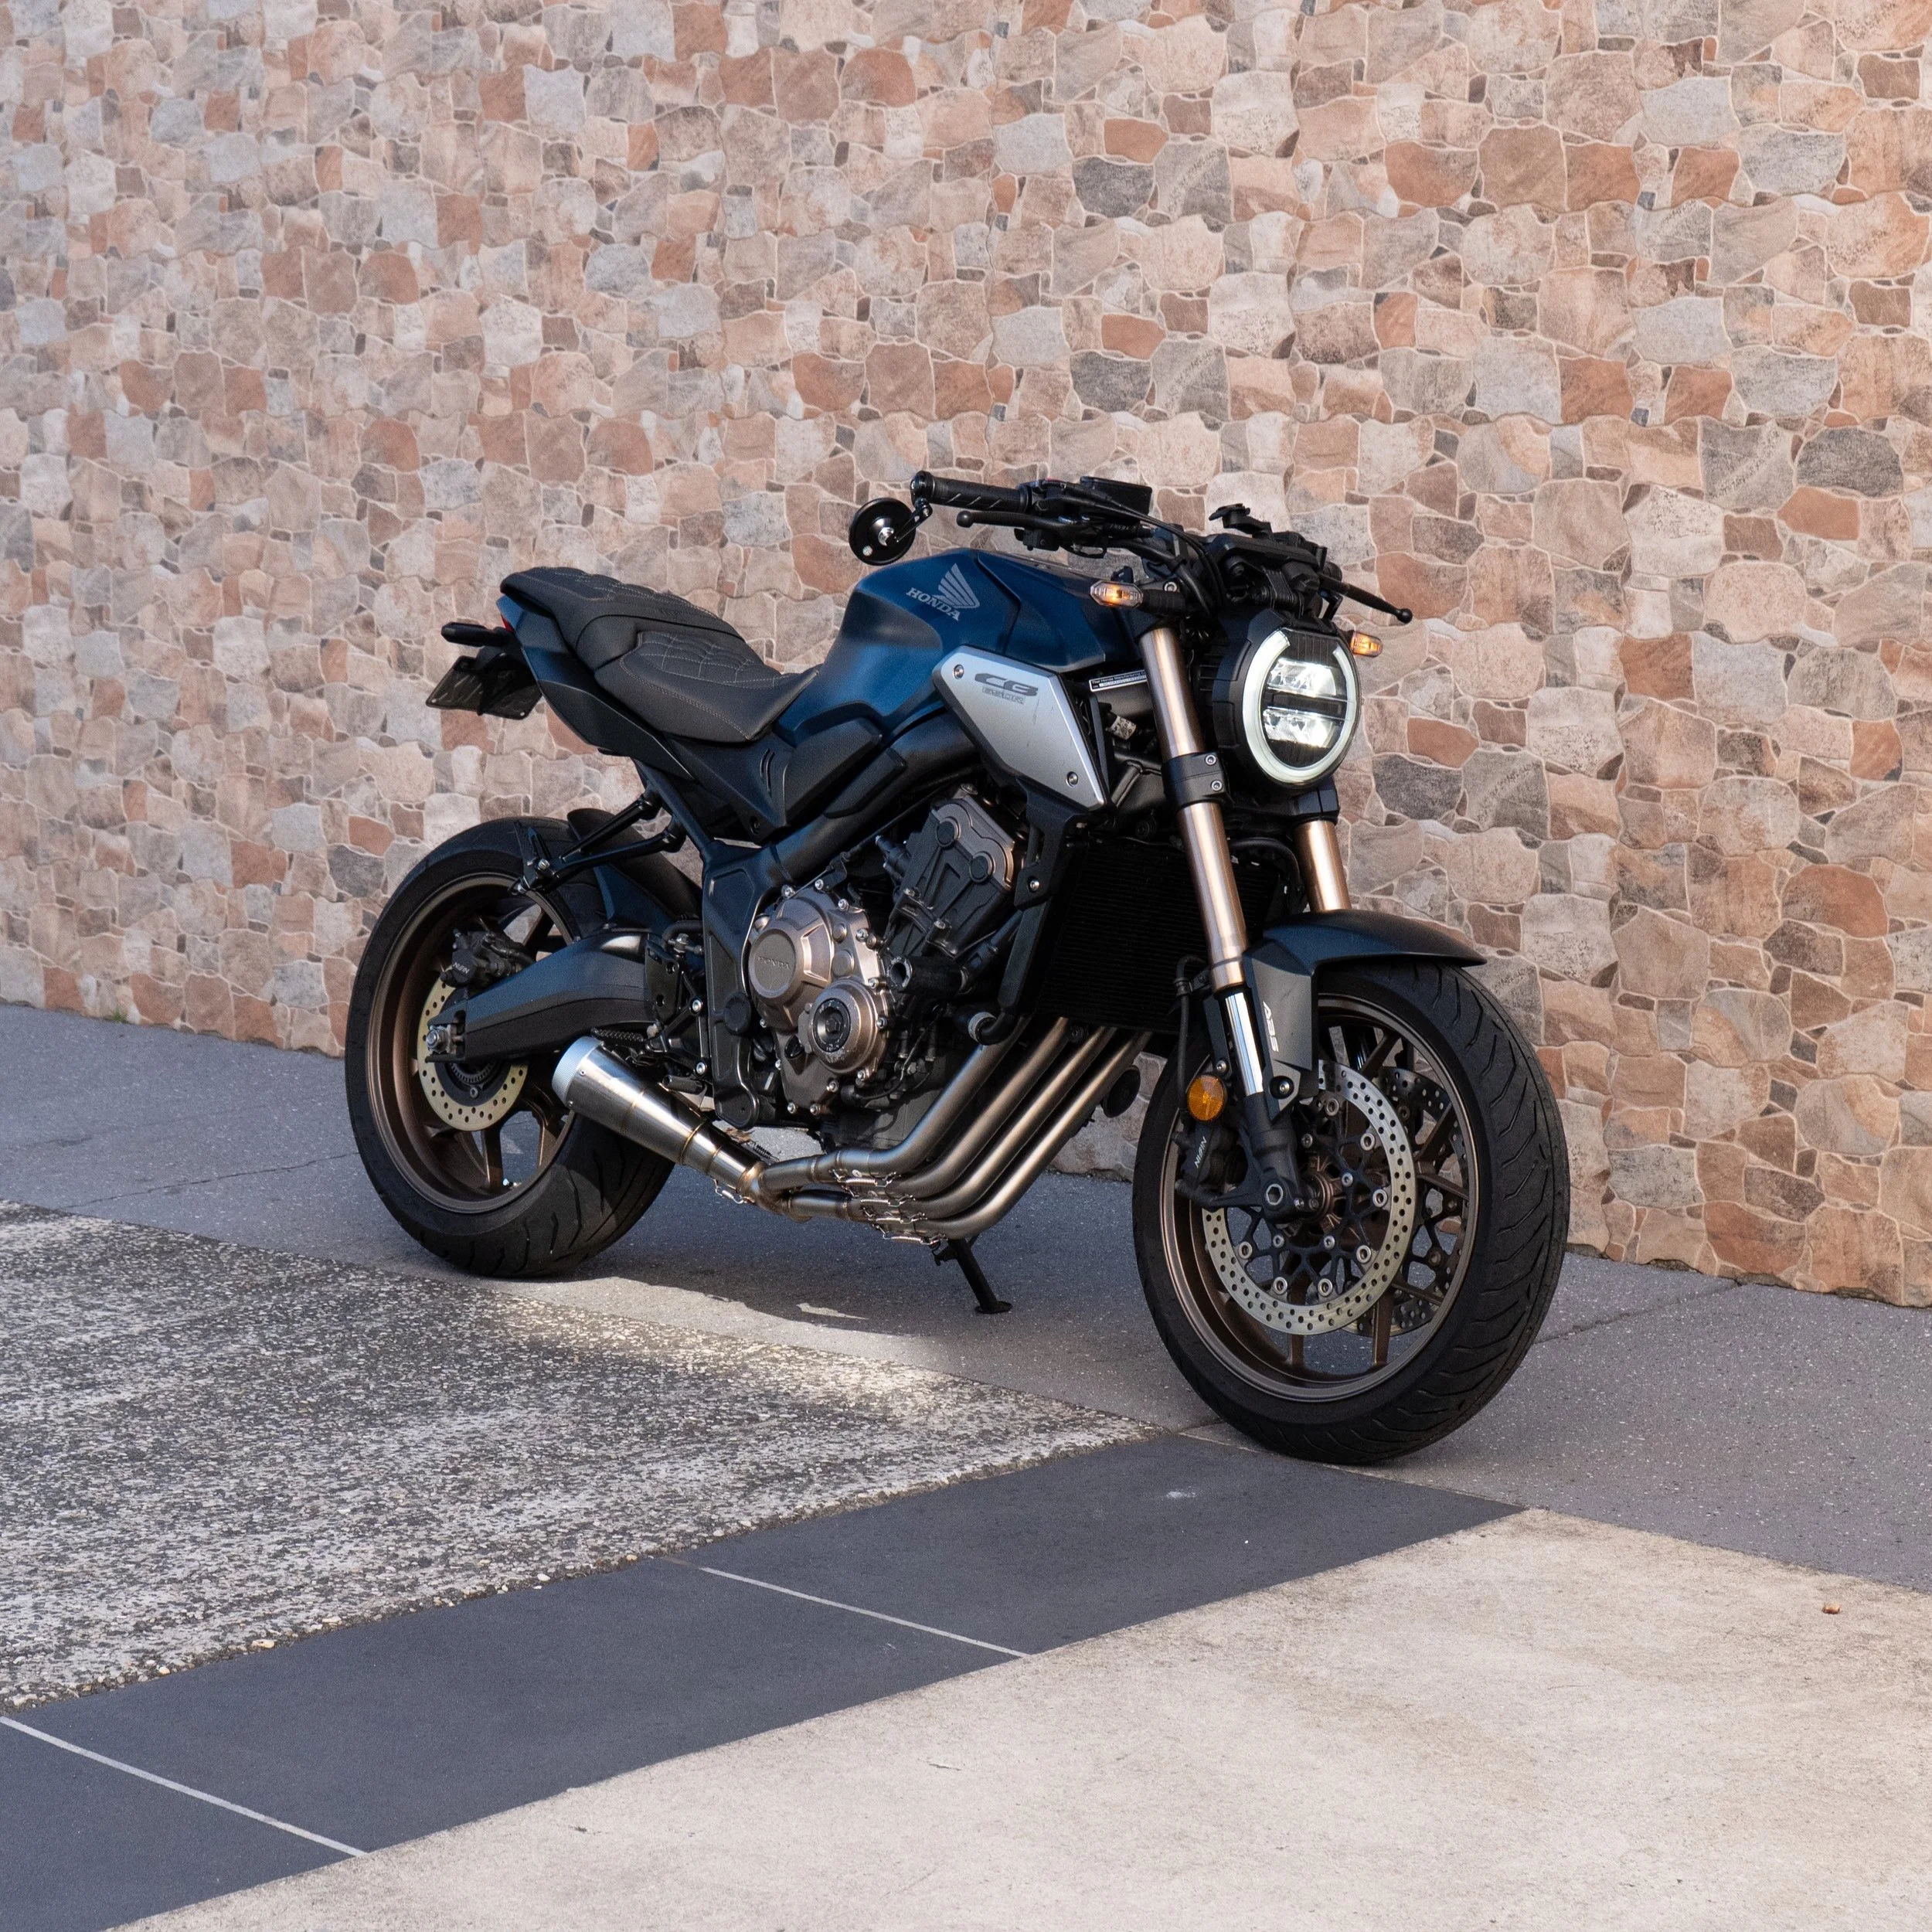
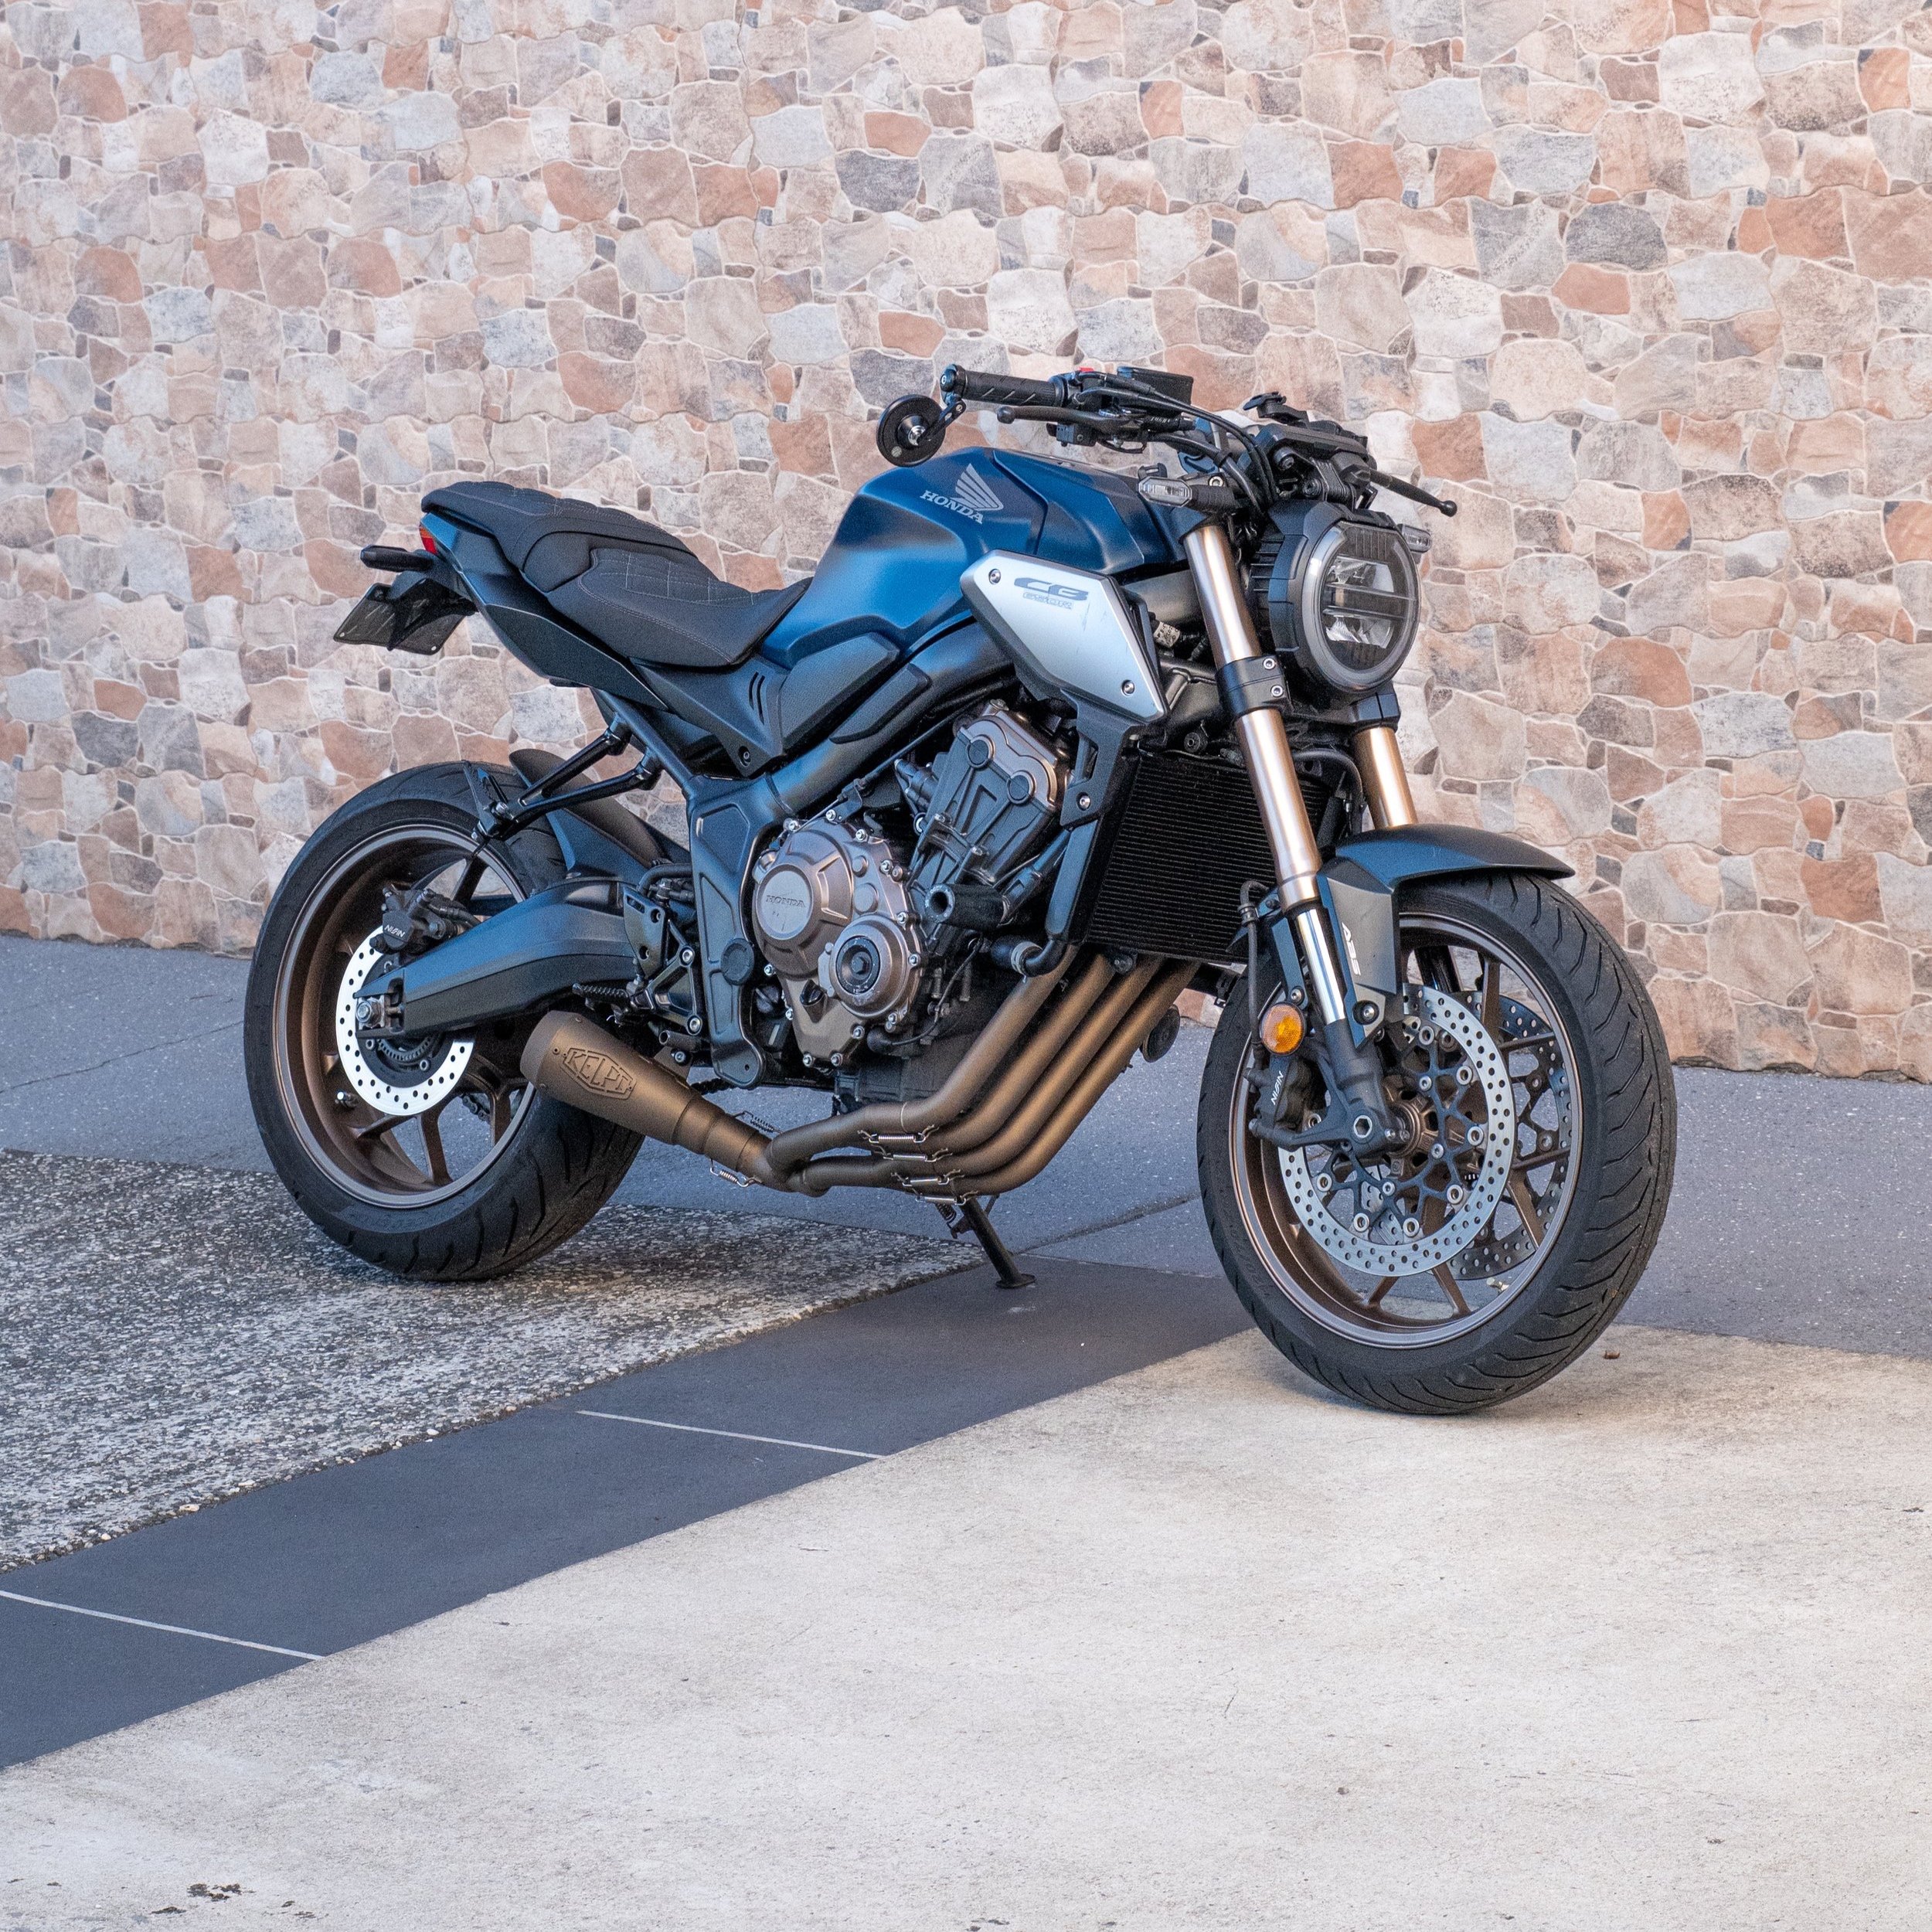
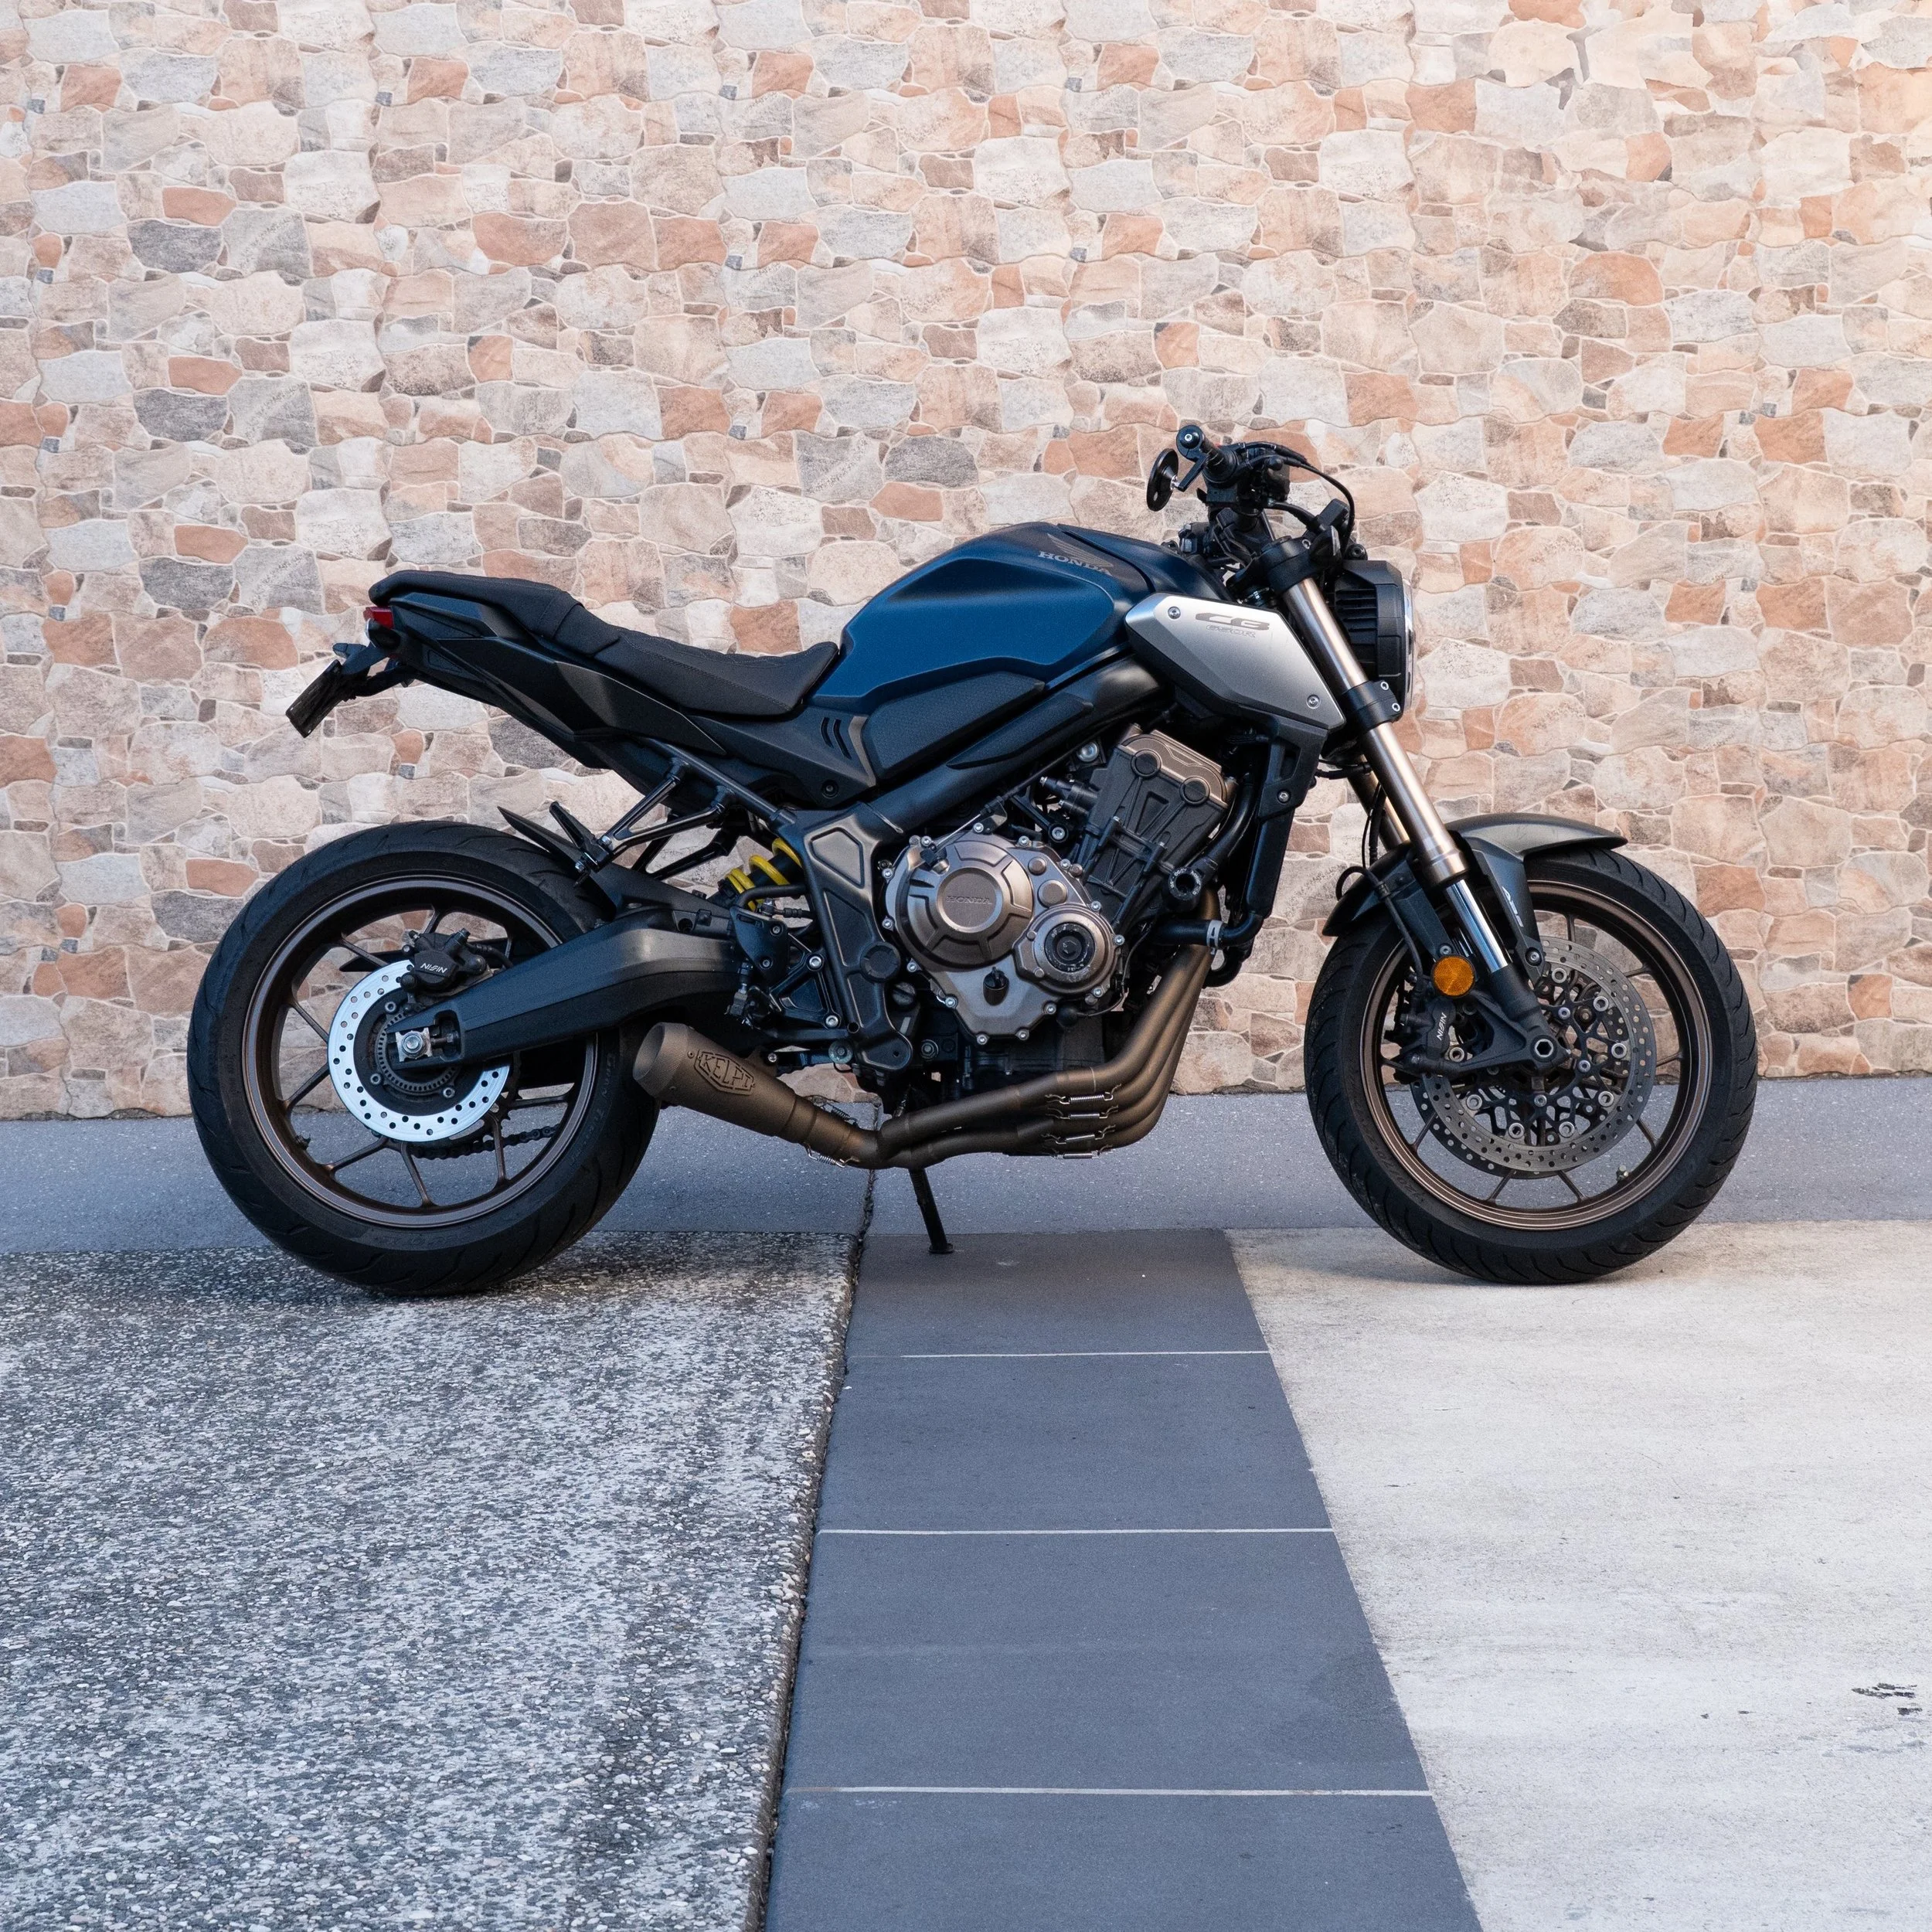
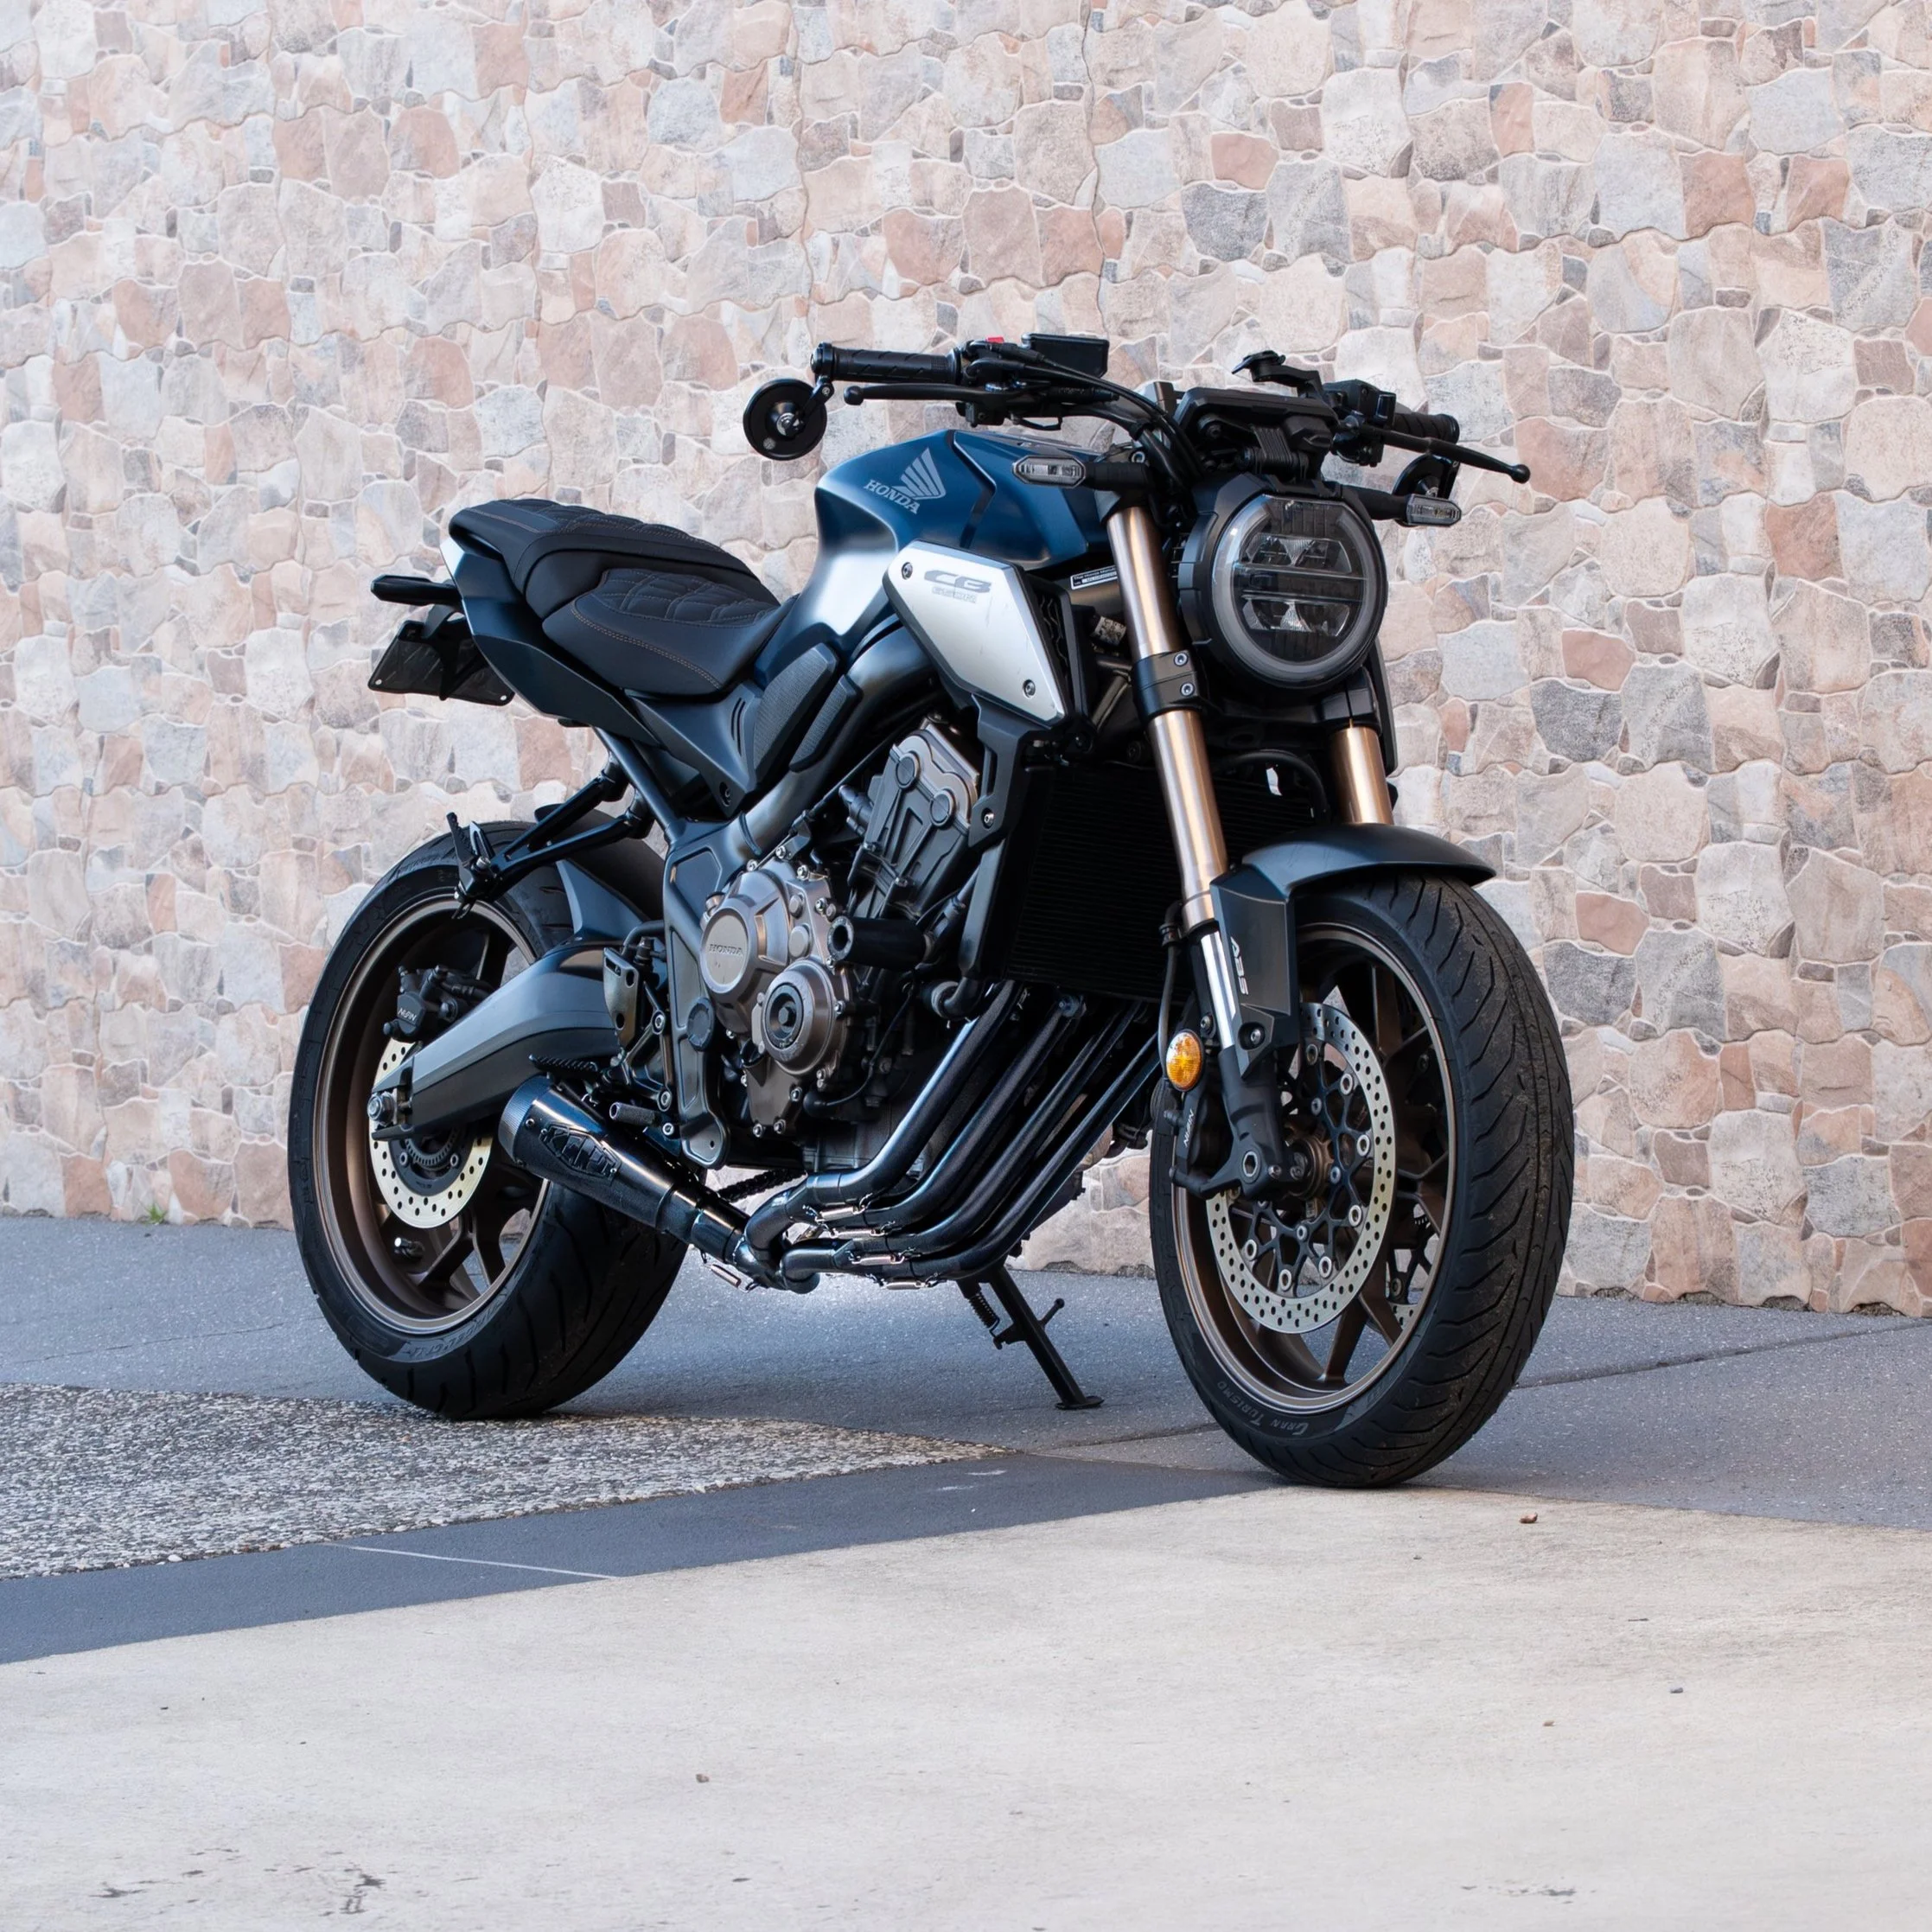
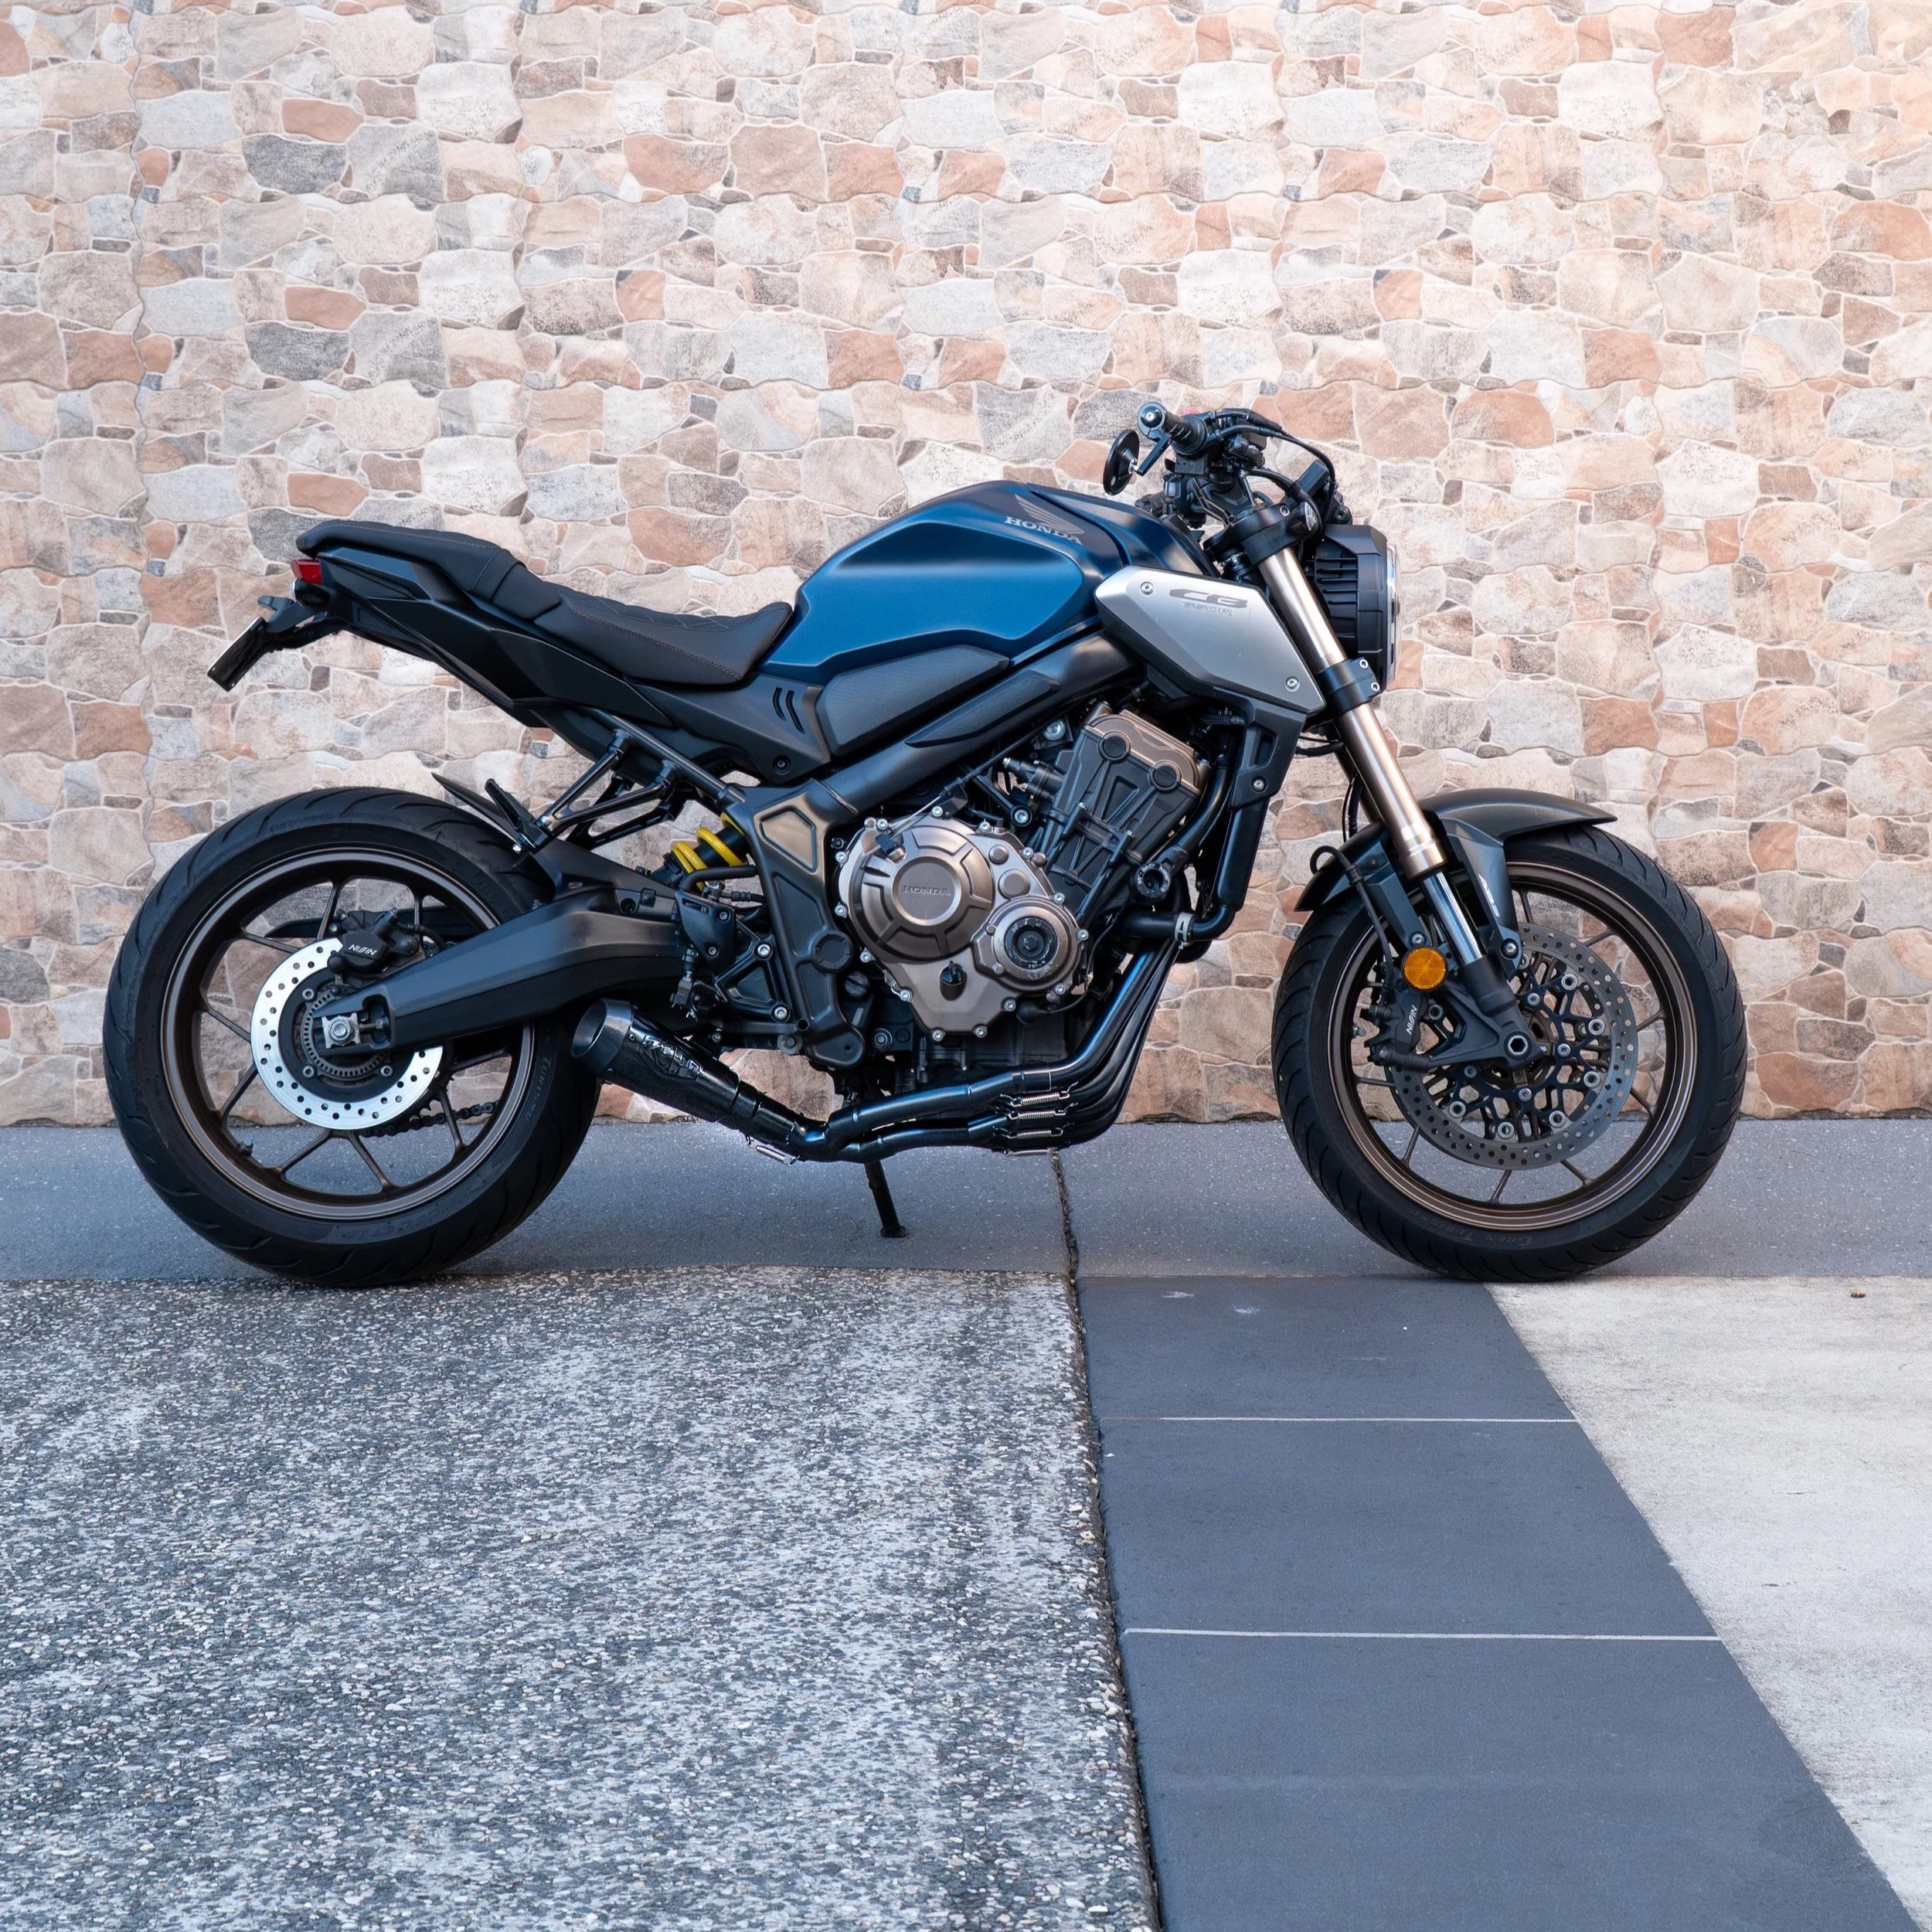
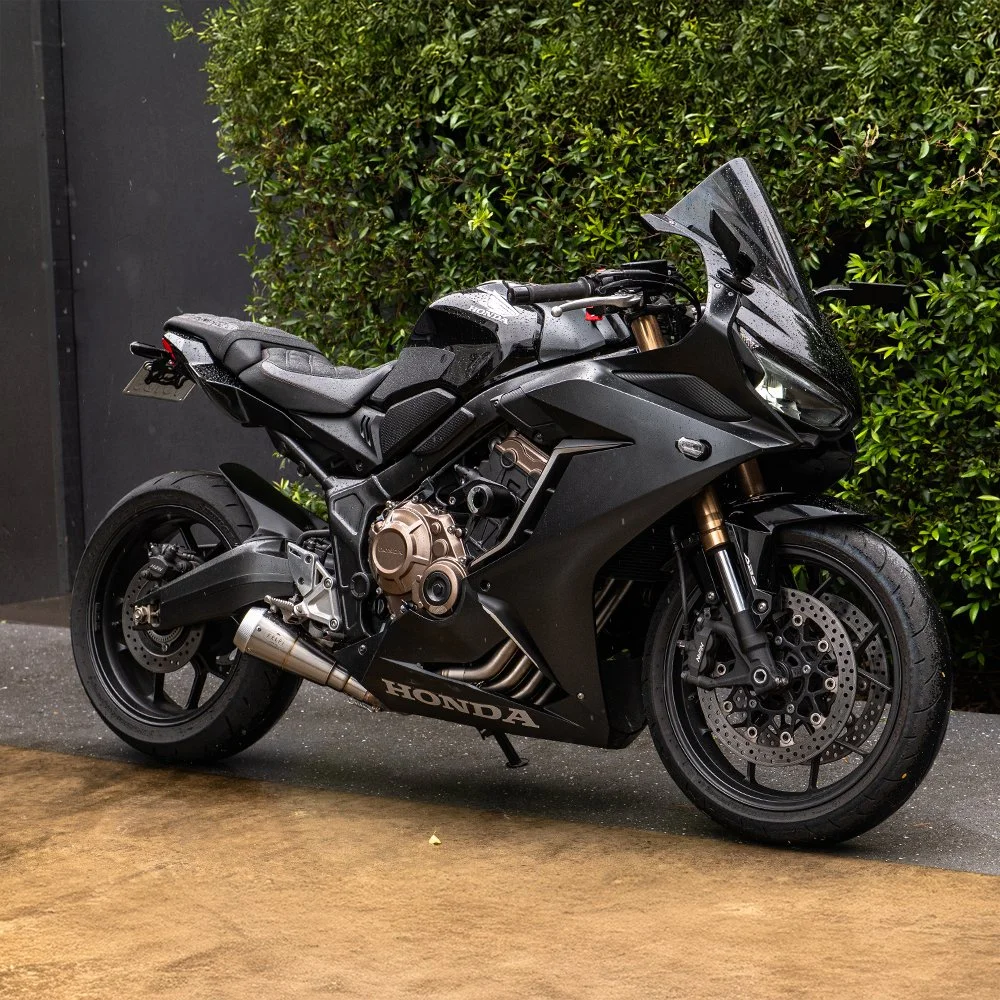
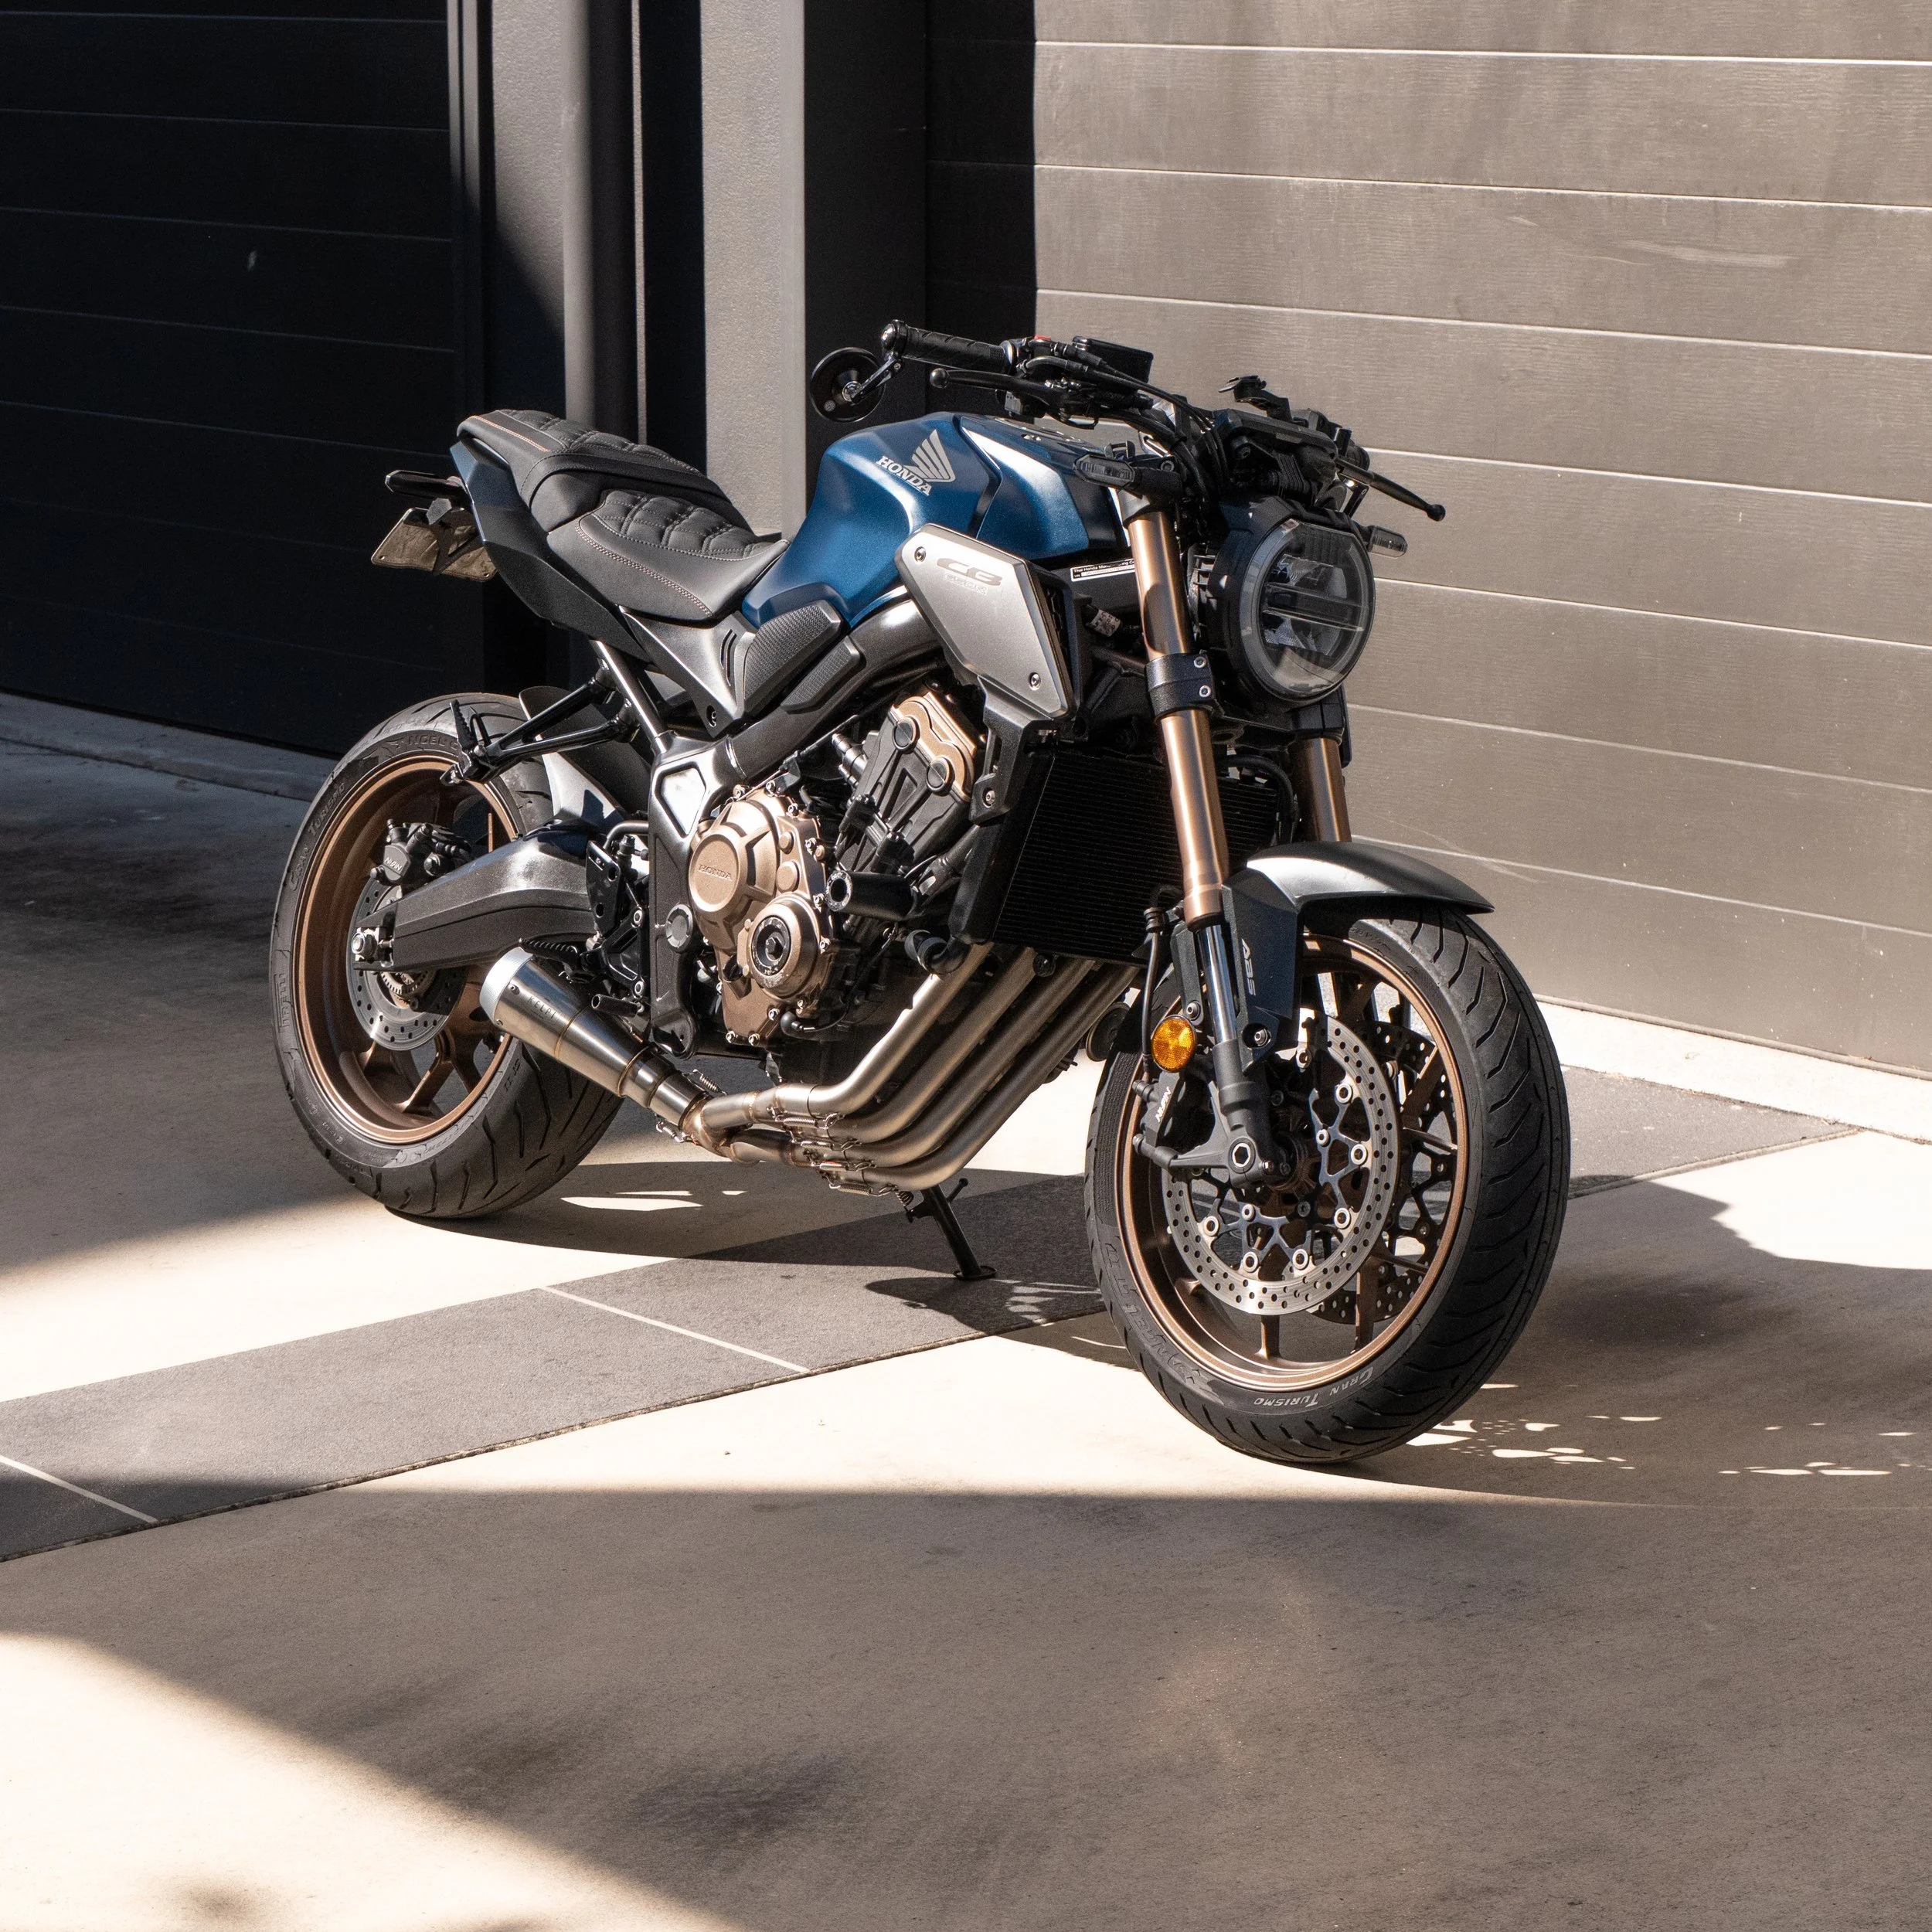
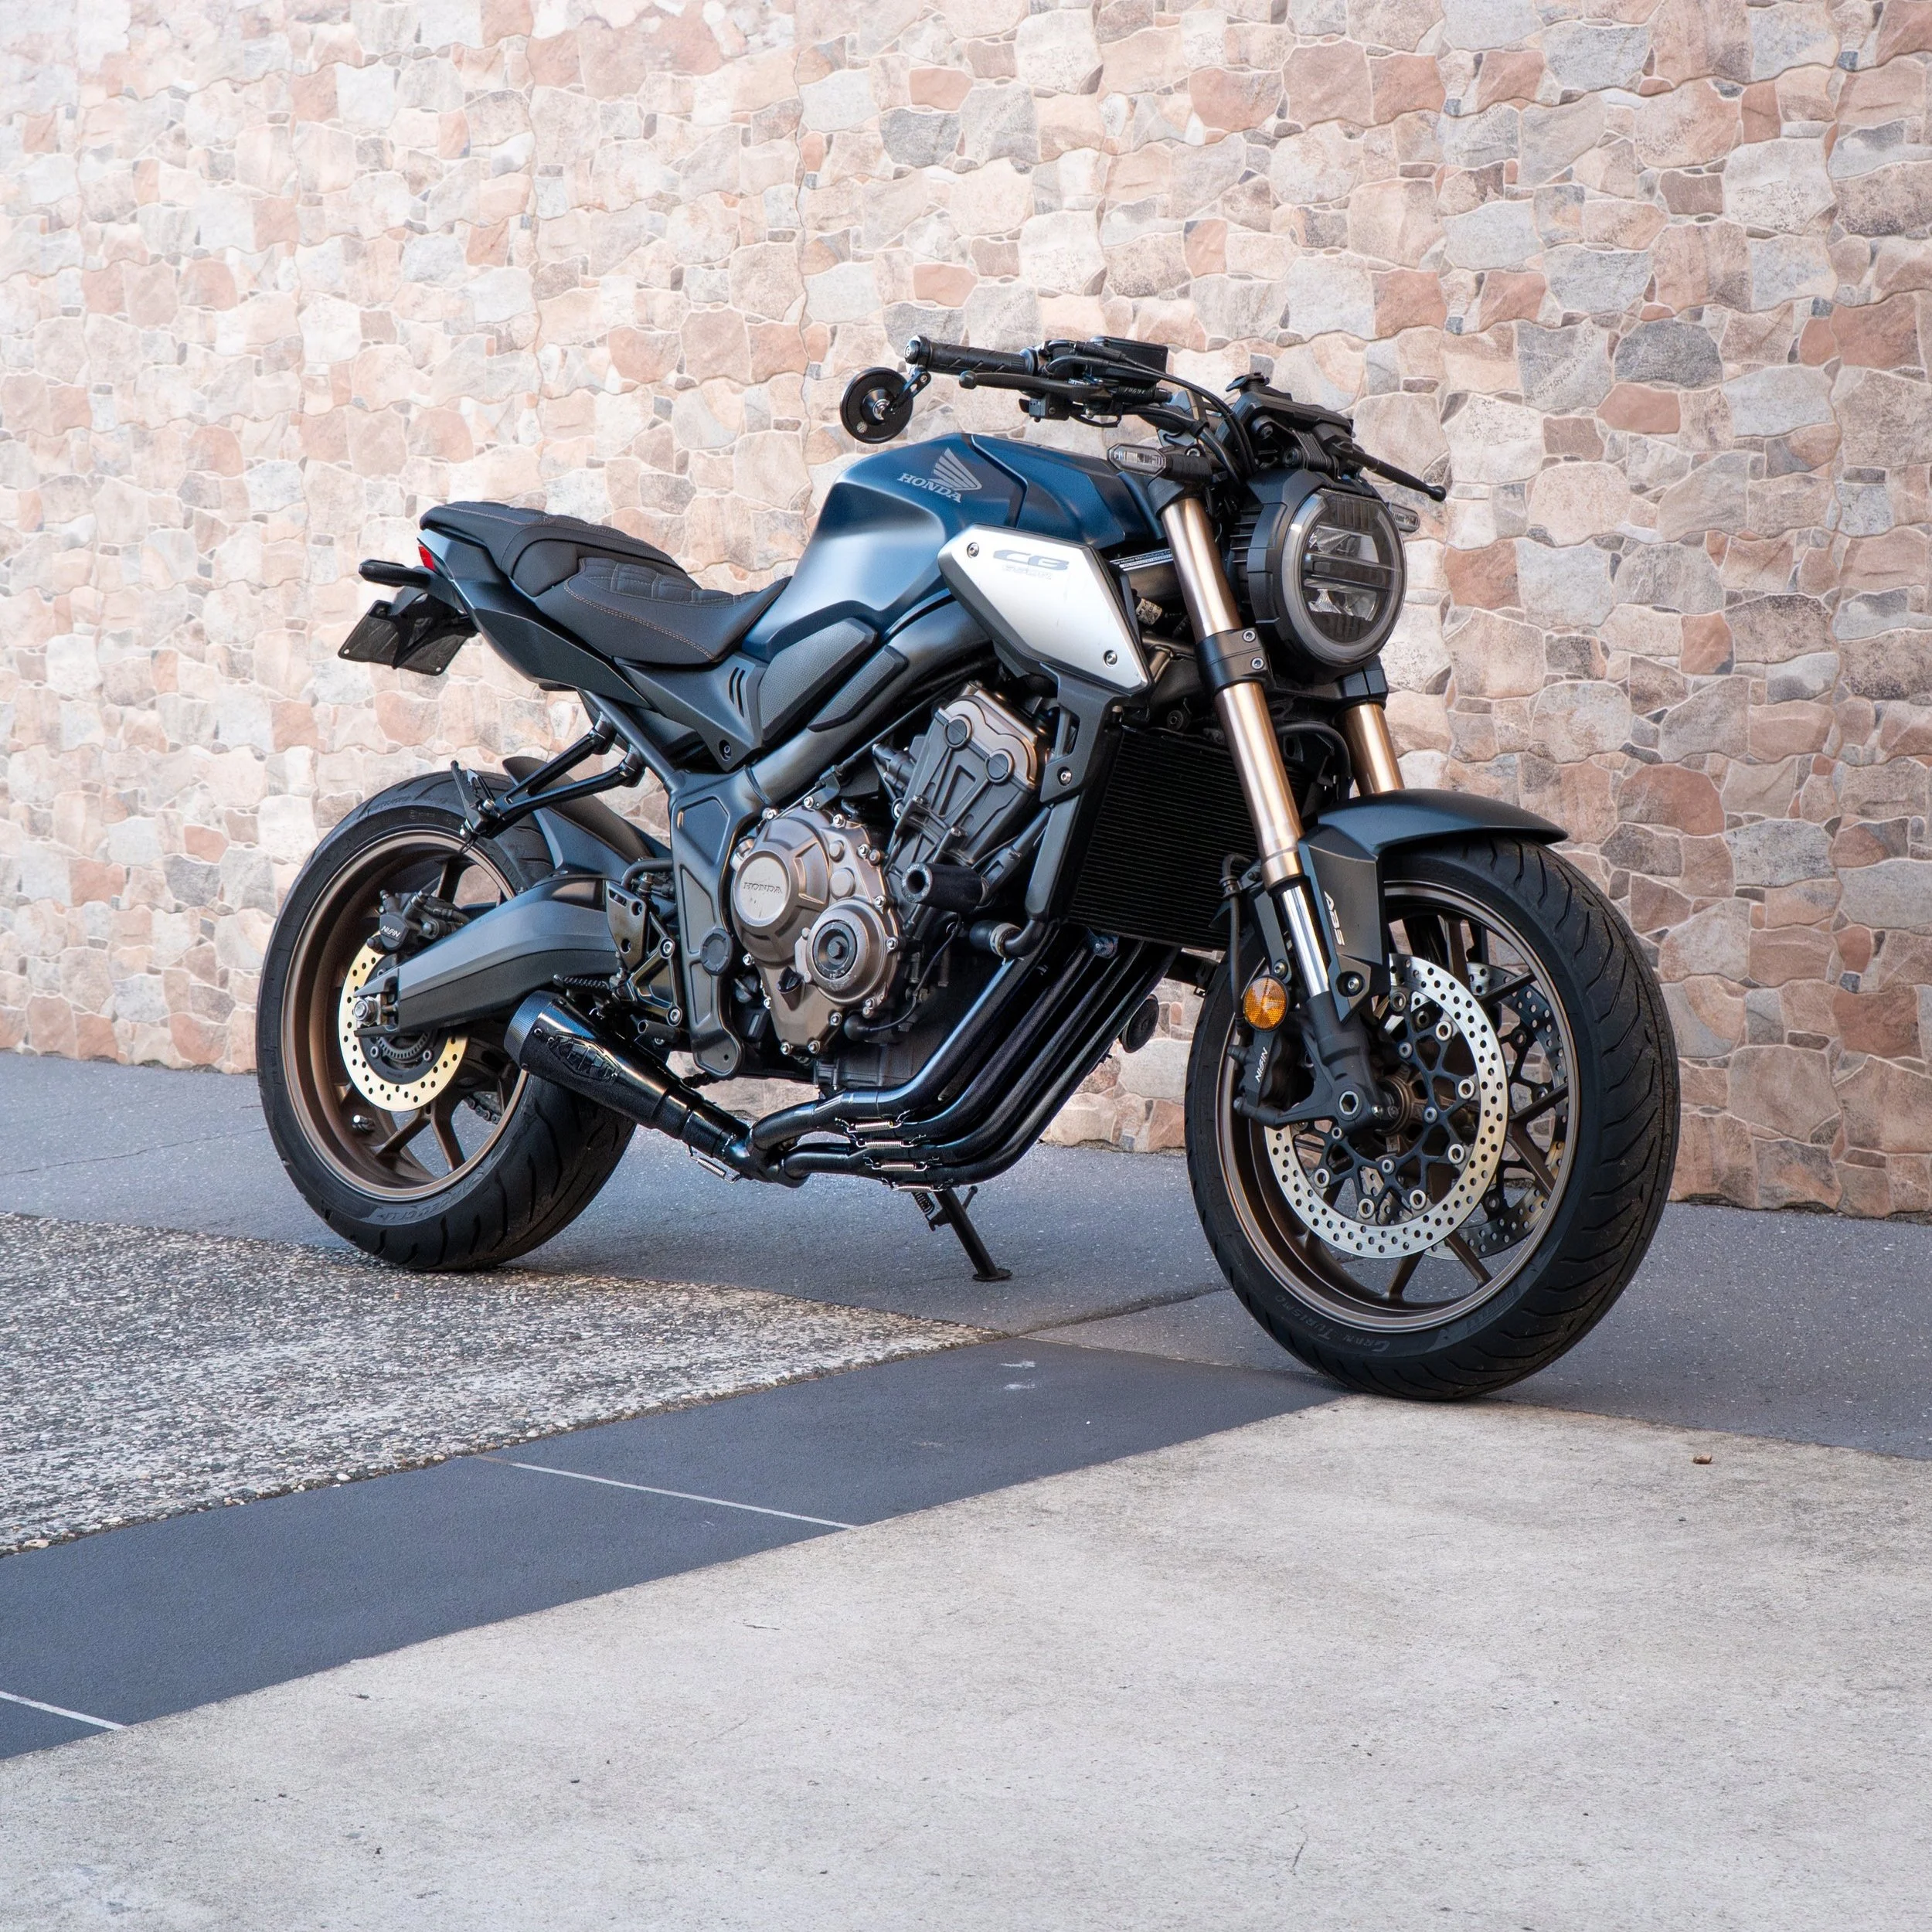
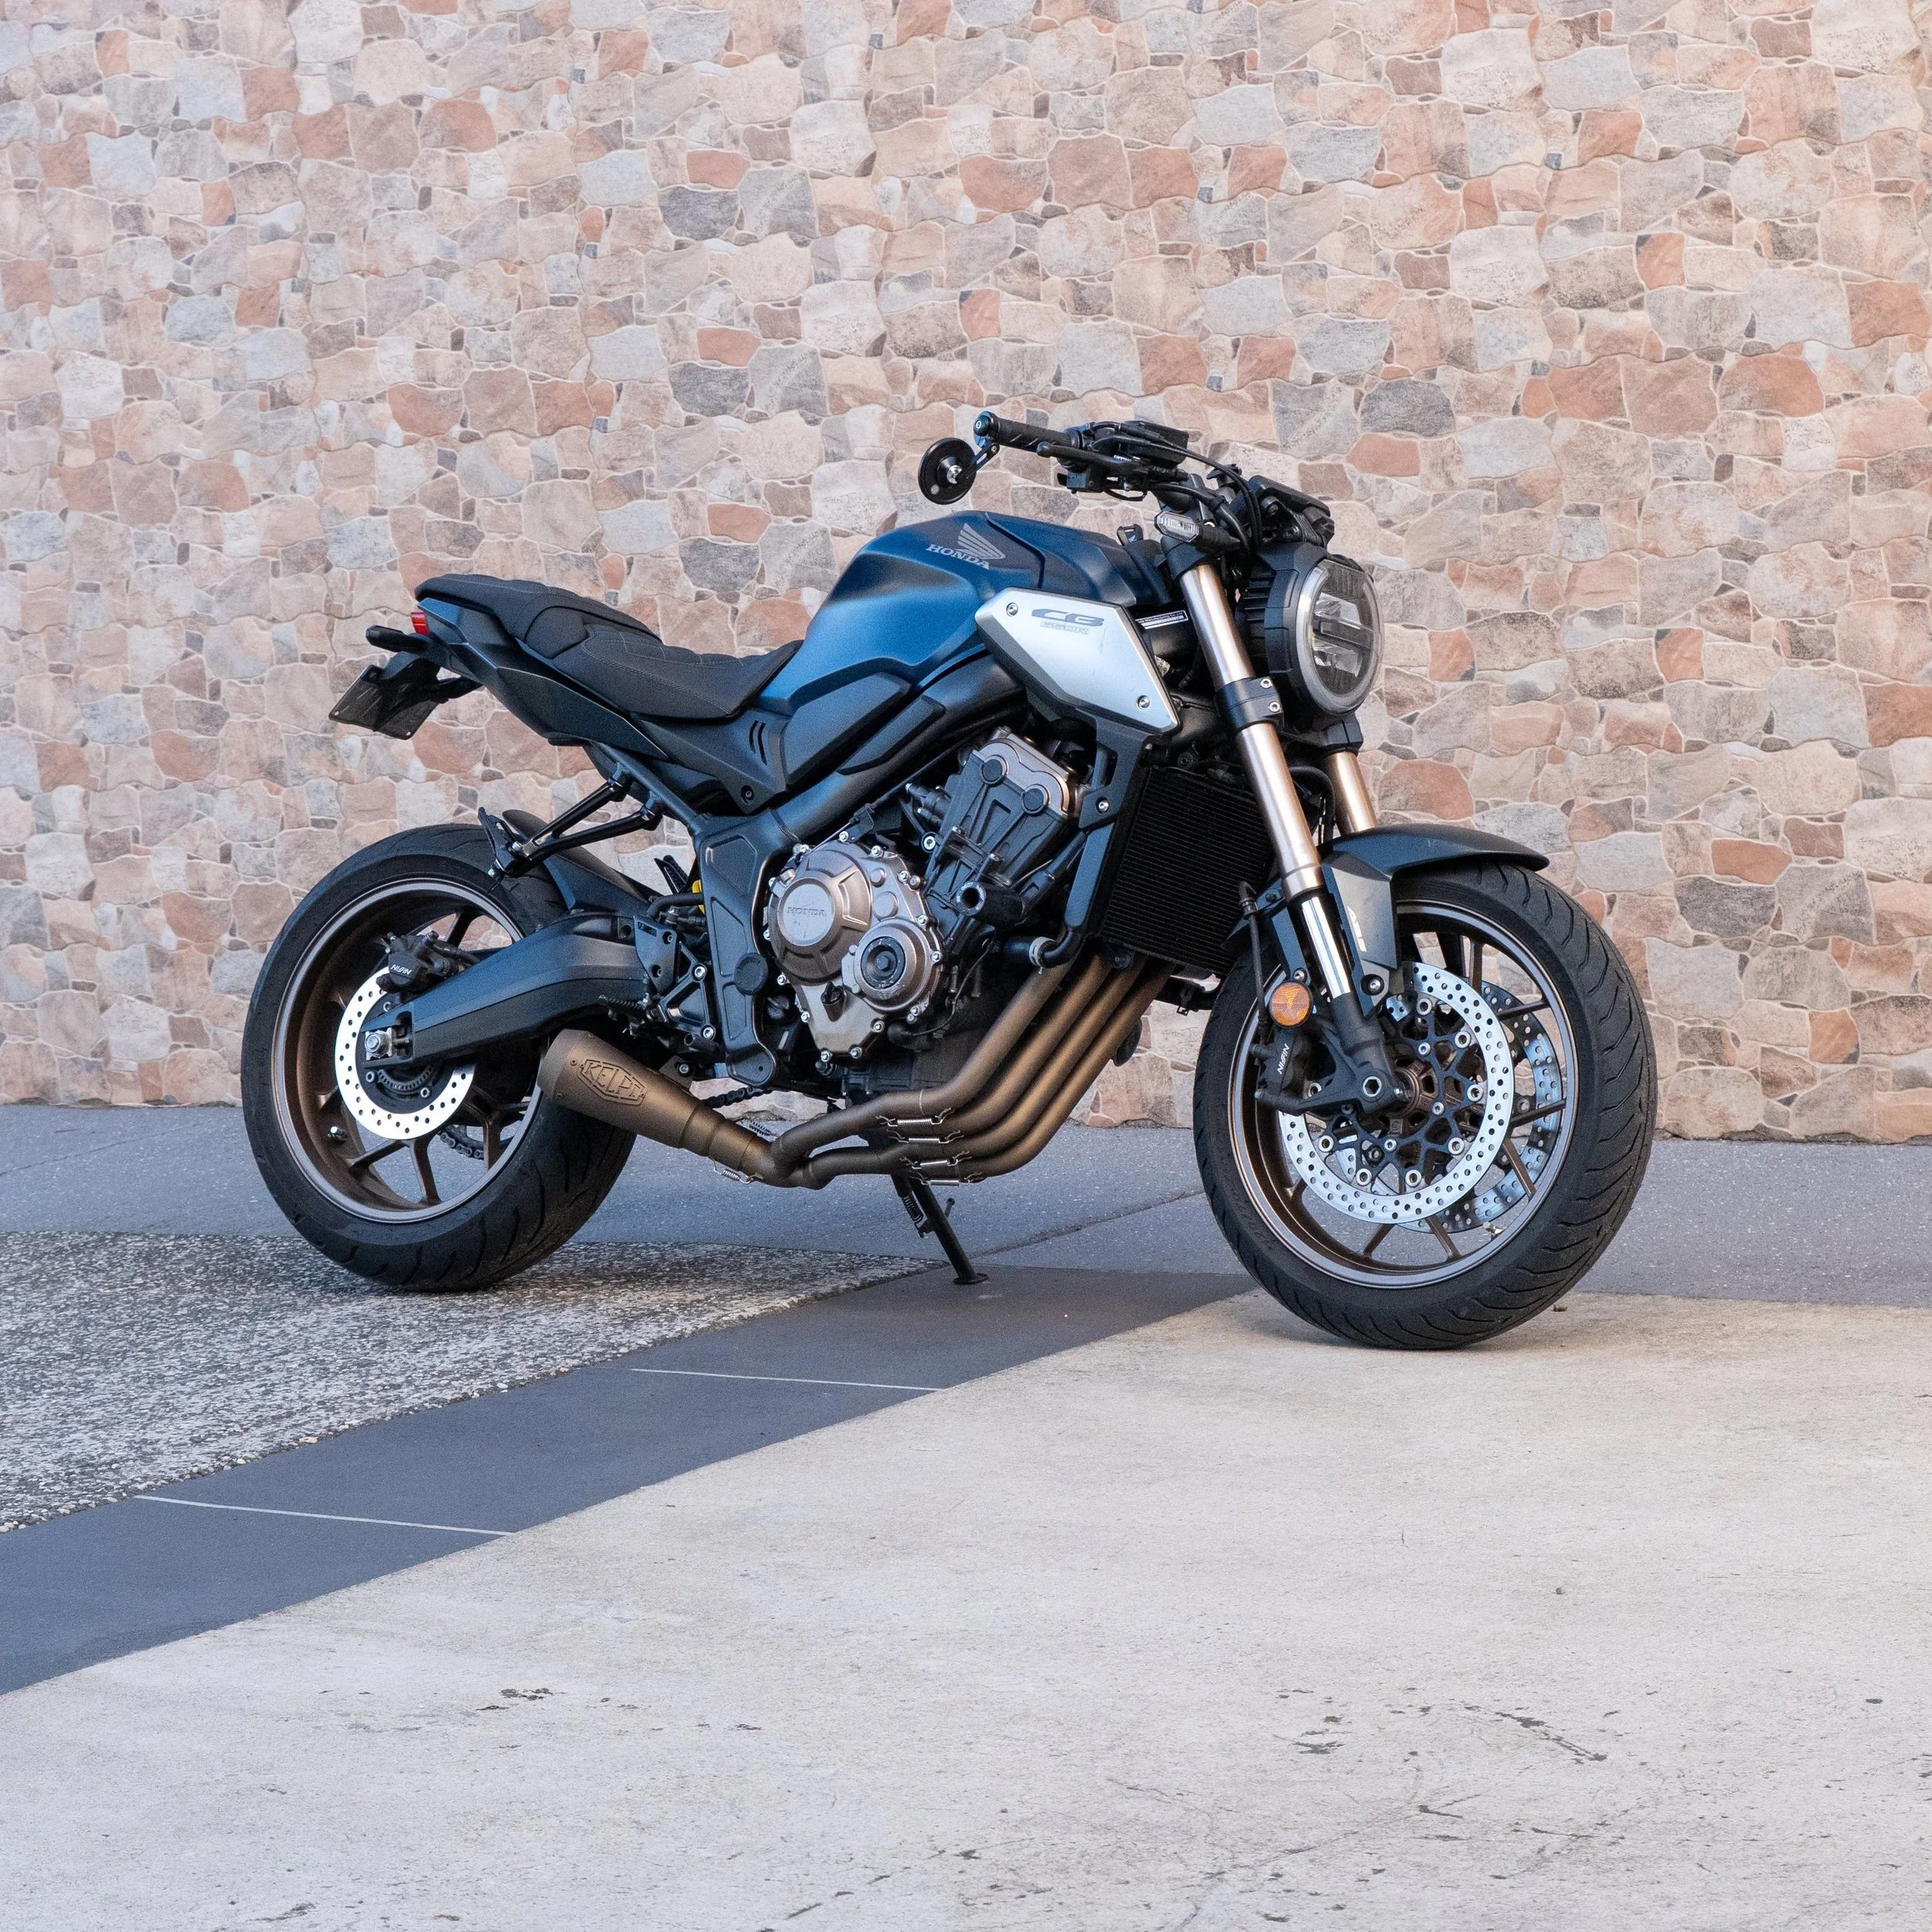
If you're chasing a sleek, underslung exhaust that matches the aggression and rev-happy nature of Honda’s 650cc inline-four, this is it. Designed specifically for the CB650R and CBR650R (and also fitting the previous CB650F and CBR650F models), this system delivers a sharper throttle response, a deeper, more visceral tone, and a stripped-back aesthetic that elevates the factory lines without compromise. Built from 304 stainless steel, it's purpose-built for riders who want raw performance and refined looks in one clean package.
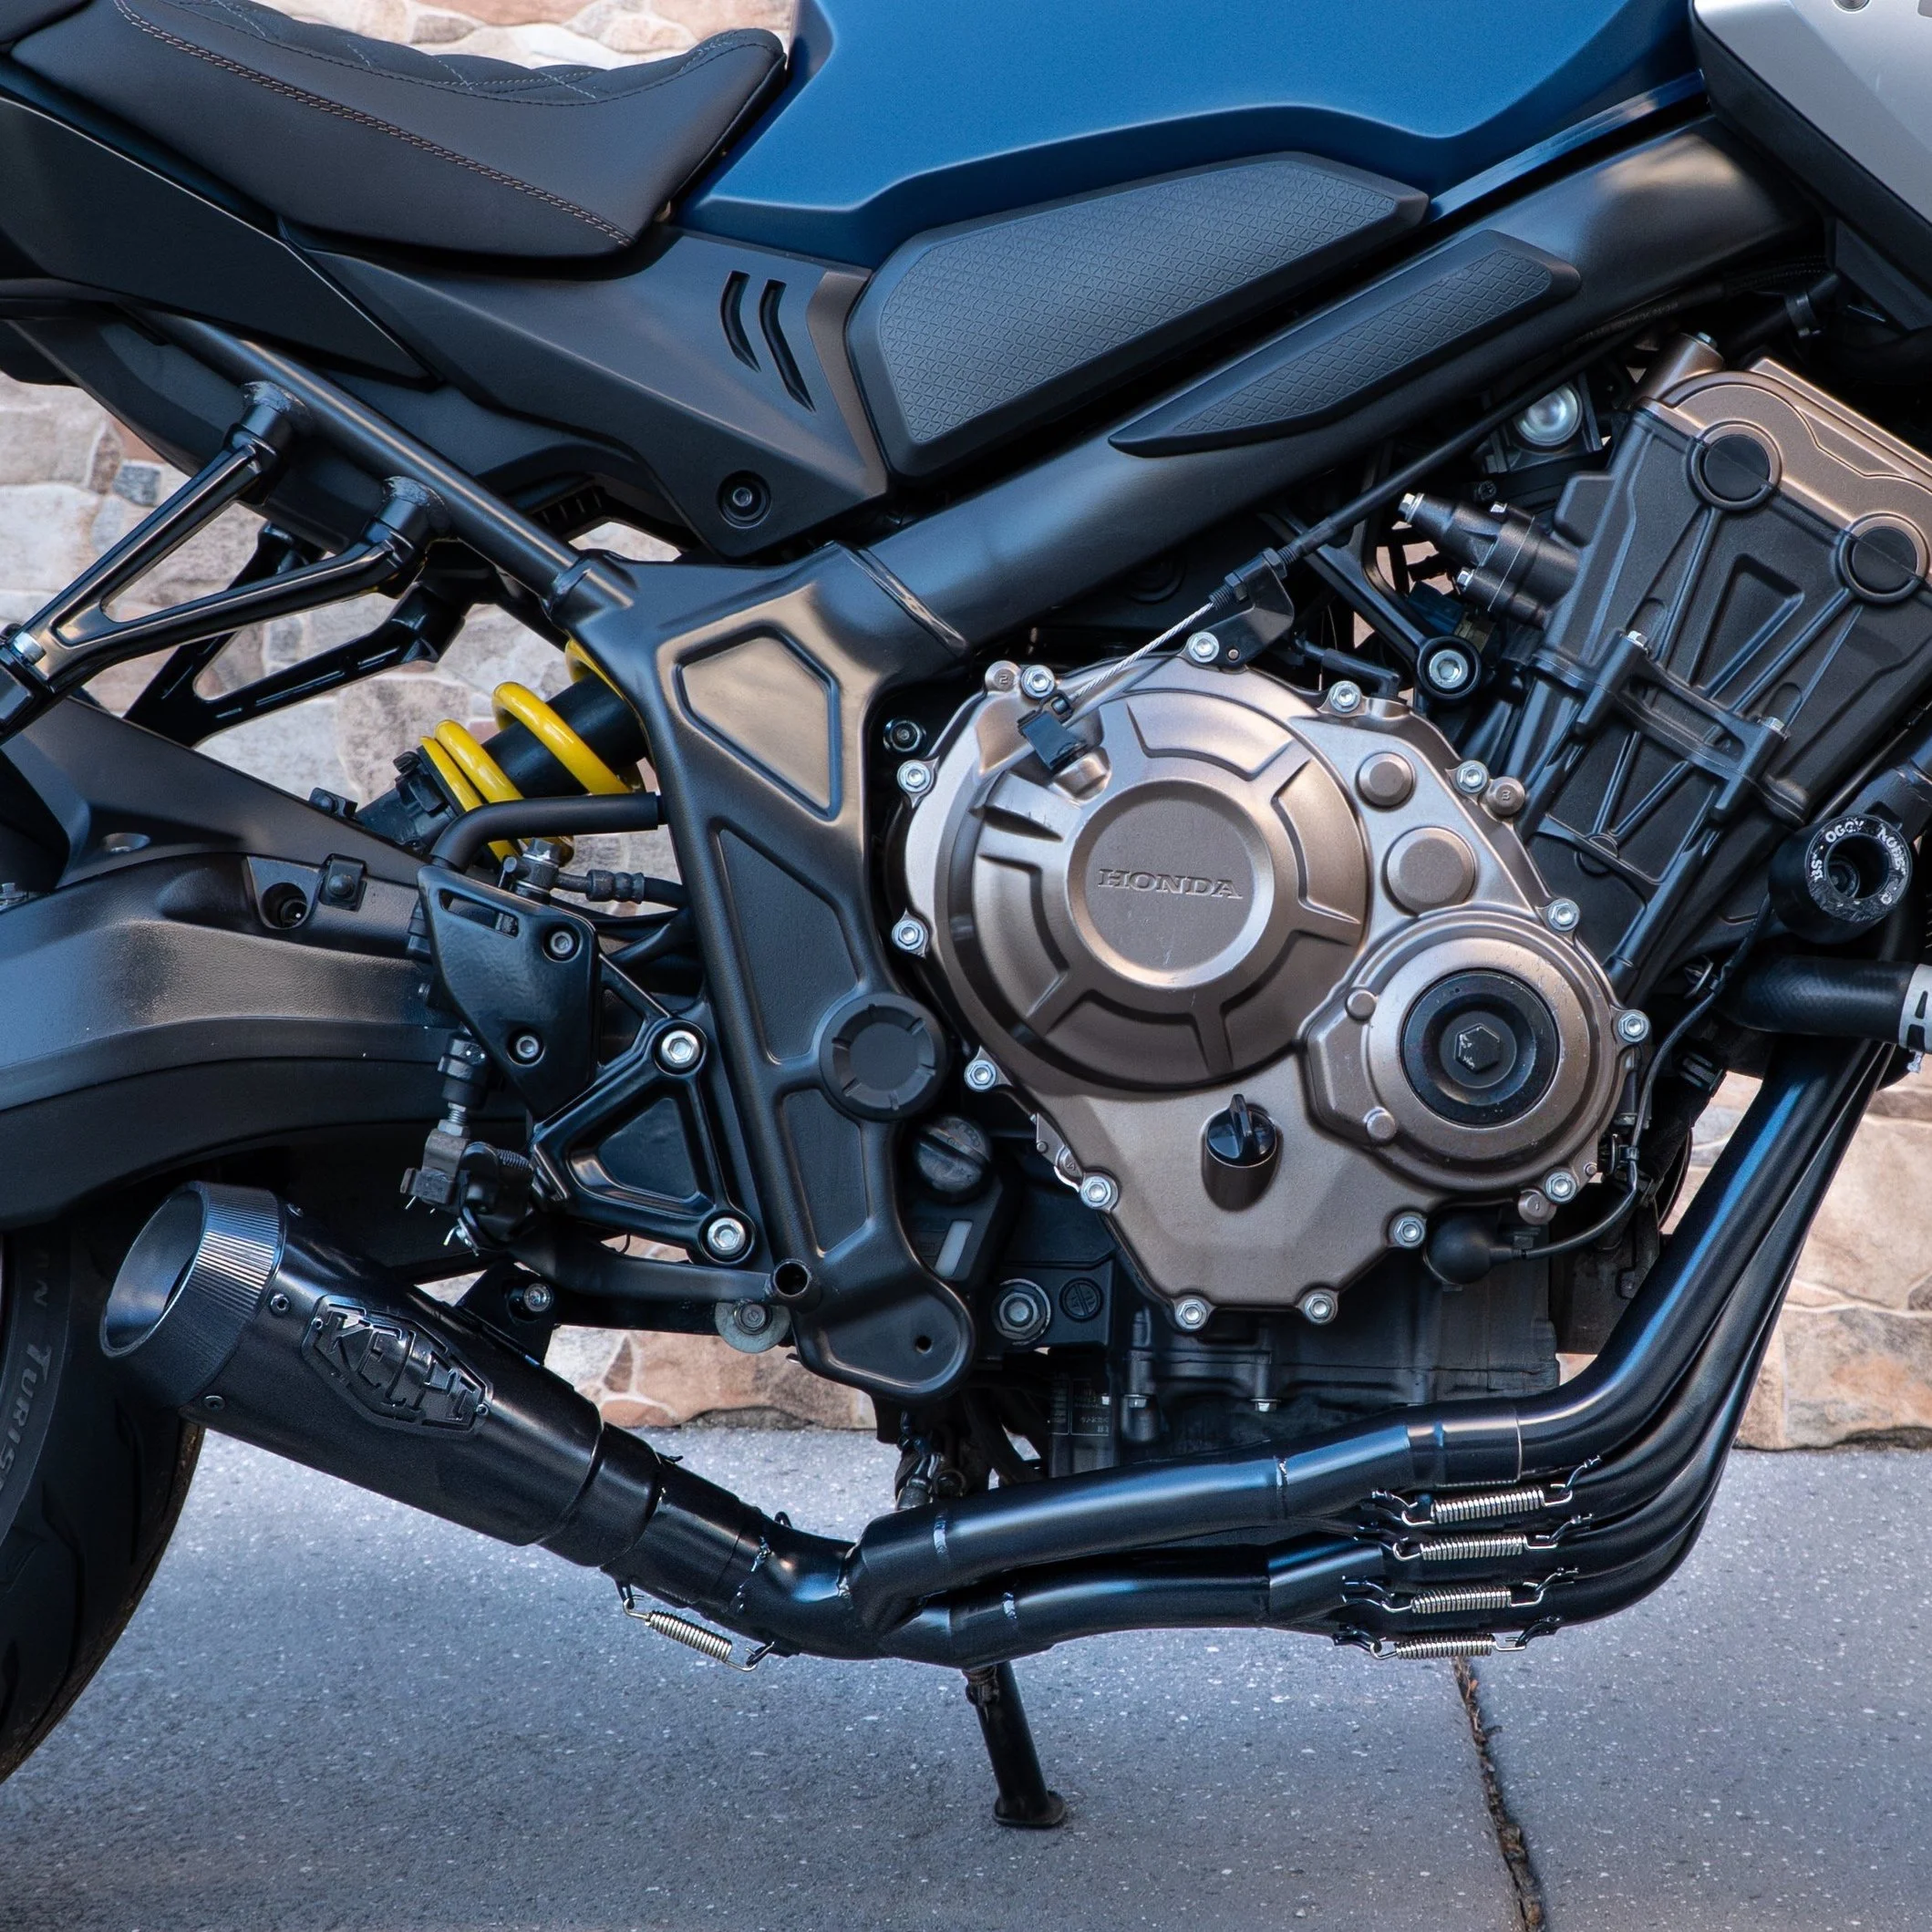
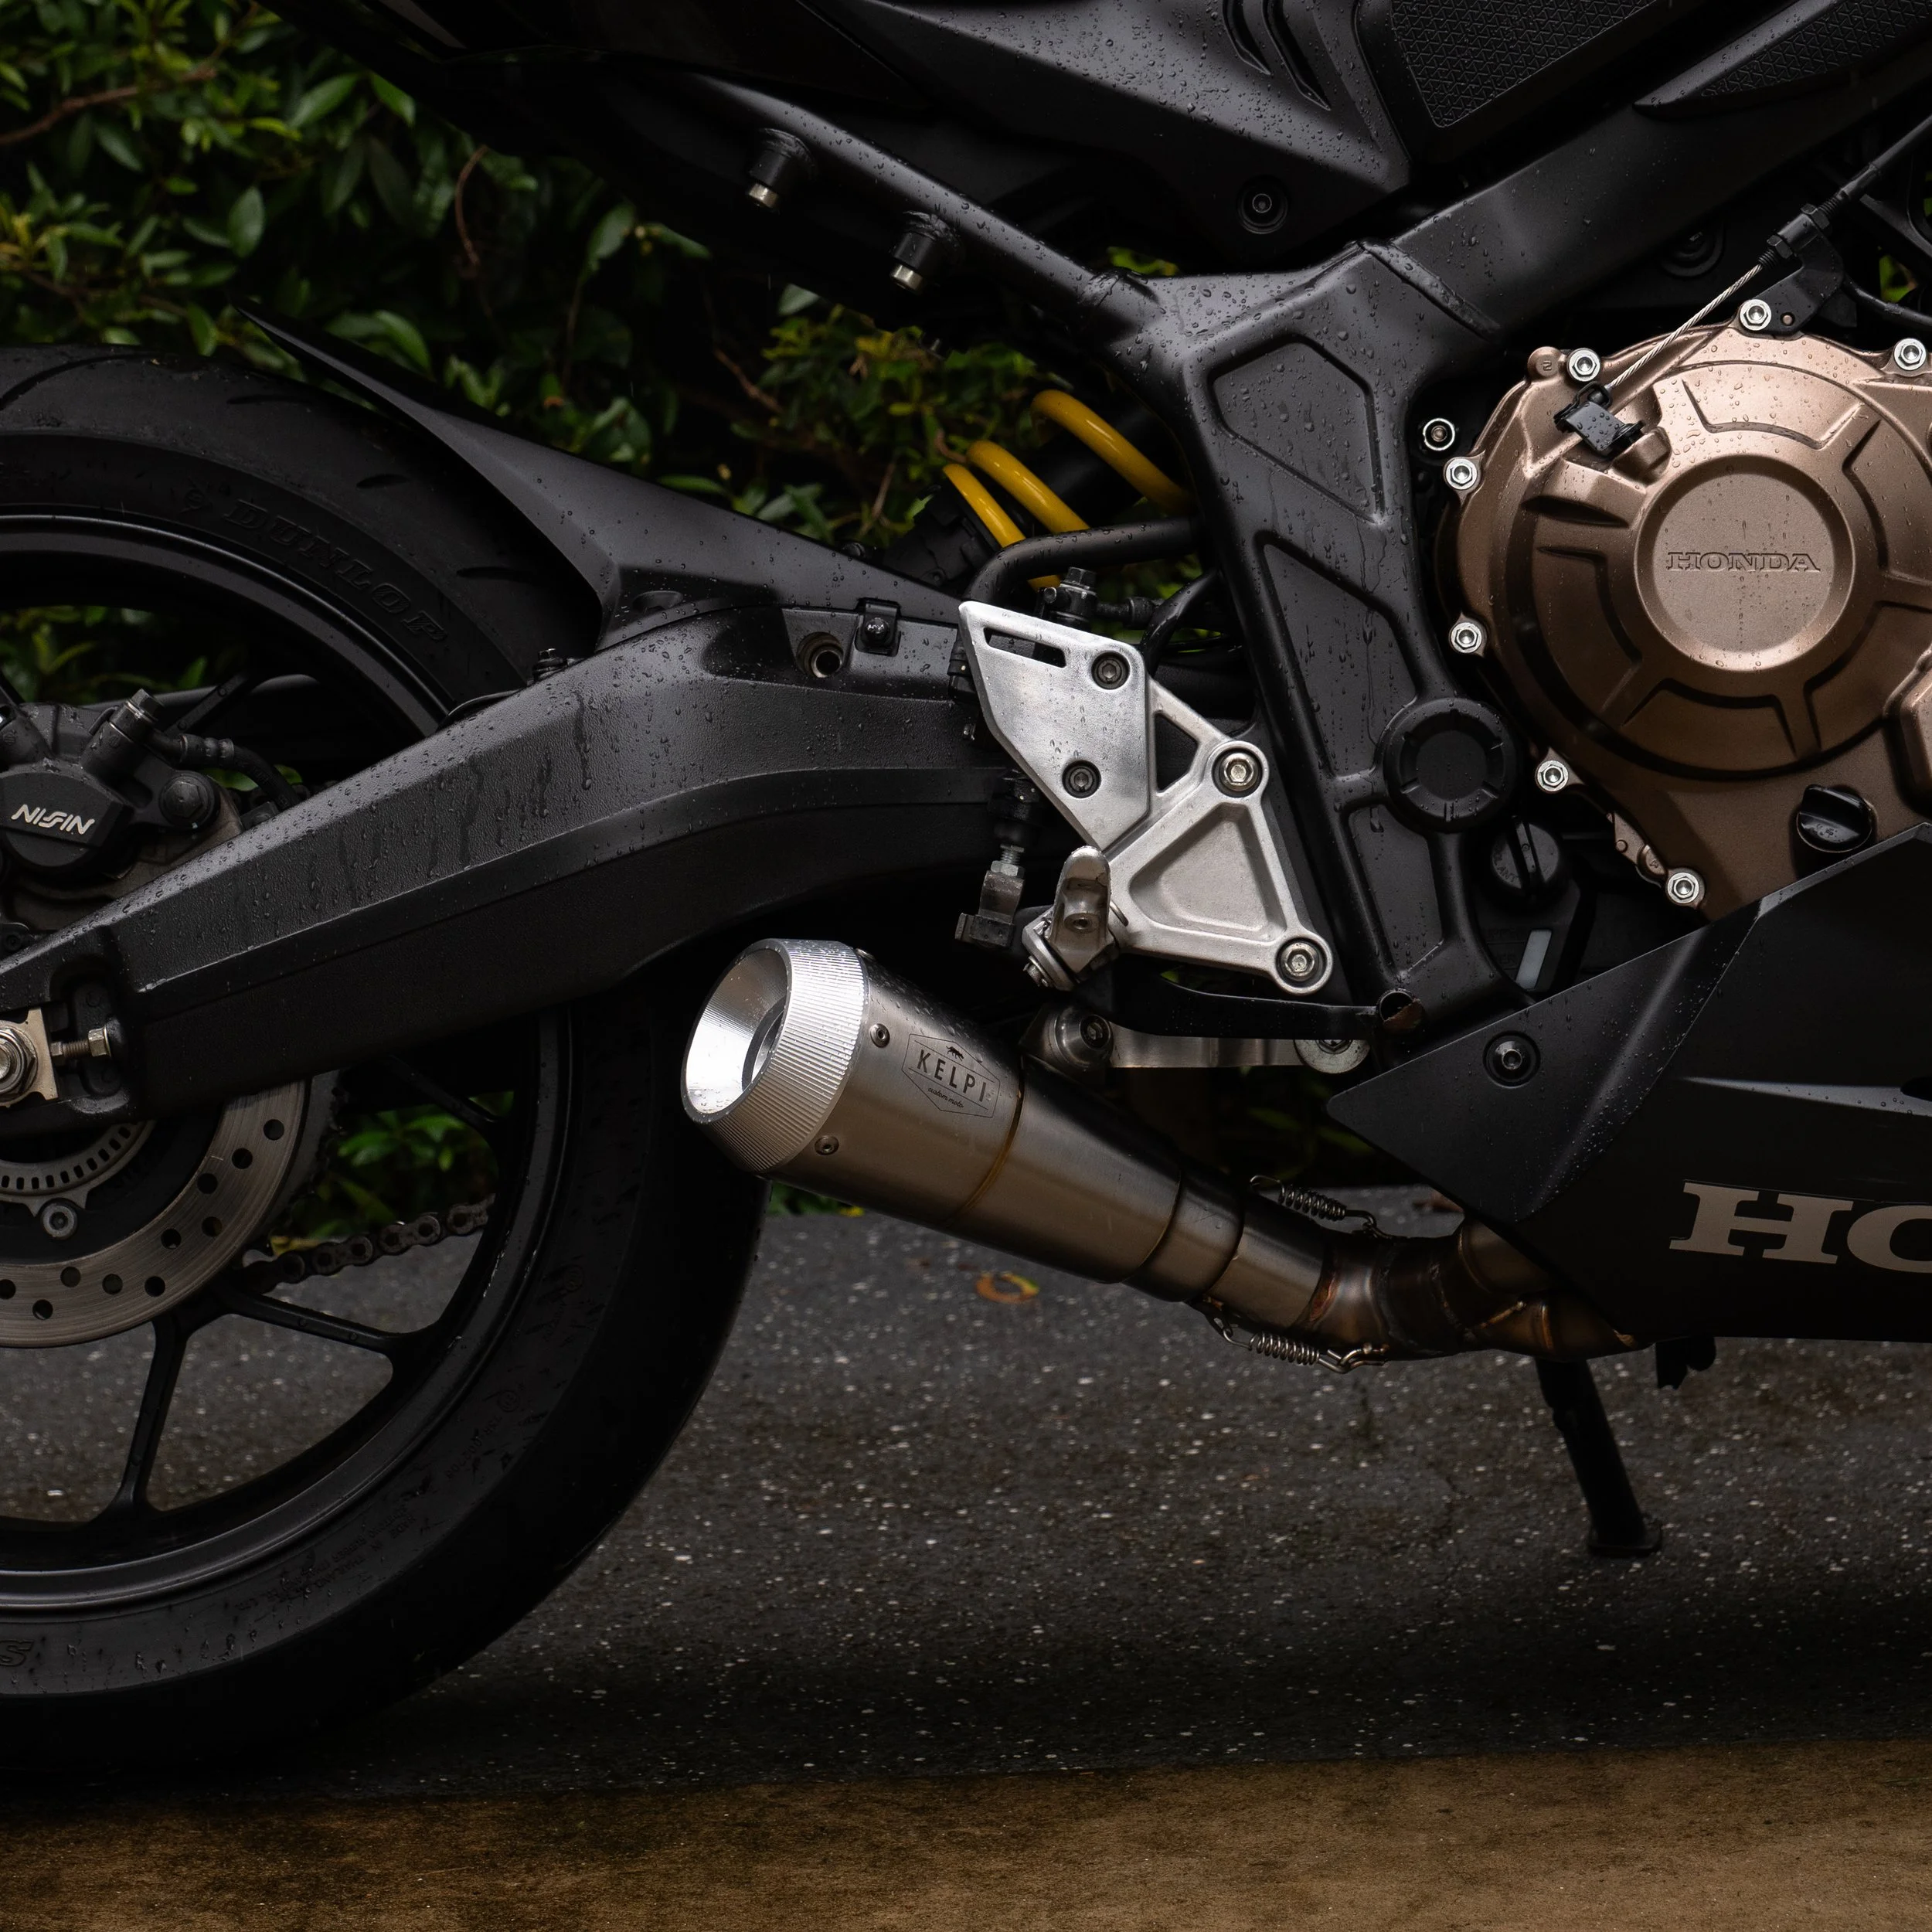
This system is available exclusively with our Shorty muffler, because we believe it’s the perfect match for the 650R (and 650F) platform. With its compact form, CNC-machined billet end cap, and bass-heavy tone, the Shorty nails the balance between performance and aesthetics, sitting low, clean, and aggressive under the bike.
Plug & Ride:
Designed to run perfectly on the stock ECU. Remove the baffle for more volume or pair with an aftermarket air filter and dyno tune for maximum gains. If running no baffle and aftermarket intake modifications, we recommend a tune to suit.
Fits:
Honda CB650F (2014-2018)
Honda CBR650F (2014-2018)
Honda CB650R (2019–2025+)
Honda CBR650R (2019–2025+)
Includes:
TIG-welded stainless headers
Stainless link pipe
Shorty muffler
Springs, fasteners, mounting bracket
Removable dB killer insert
Optional Quietcore Baffle:
An additional insert for serious volume reduction, ideal for roadworthy inspections, blue slips, or TUV compliance.
Our CB(R)650R Shorty Exhaust System is available in two variants to suit both standard and Euro 5+ models.
If your bike is a Euro 5+ model, it will have two O₂ sensors connected to the factory exhaust. Please confirm your setup before ordering and select the correct variant from the dropdown.
How to check:
For 2024 models and onwards, look underneath your stock exhaust system, if you see two oxygen sensors threaded in, your bike requires the Euro 5+ compatible version. If there’s only one, select the standard version.
Need help confirming your bike’s setup? Flick us an email or DM with a photo of your factory exhaust, we’re happy to help.
Install Time: ~1–1.5 hours
Tools Needed: HEX set, sockets, wrenches, basic hand tools
Performance Meets Precision for Honda’s Inline-Four Street Weapon
If you're chasing a sleek, underslung exhaust that matches the aggression and rev-happy nature of Honda’s 650cc inline-four, this is it. Designed specifically for the CB650R and CBR650R (and also fitting the previous CB650F and CBR650F models), this system delivers a sharper throttle response, a deeper, more visceral tone, and a stripped-back aesthetic that elevates the factory lines without compromise. Built from 304 stainless steel, it's purpose-built for riders who want raw performance and refined looks in one clean package.
This system is available exclusively with our Shorty muffler, because we believe it’s the perfect match for the 650R (and 650F) platform. With its compact form, CNC-machined billet end cap, and bass-heavy tone, the Shorty nails the balance between performance and aesthetics, sitting low, clean, and aggressive under the bike.
Plug & Ride:
Designed to run perfectly on the stock ECU. Remove the baffle for more volume or pair with an aftermarket air filter and dyno tune for maximum gains. If running no baffle and aftermarket intake modifications, we recommend a tune to suit.
Fits:
Honda CB650F (2014-2018)
Honda CBR650F (2014-2018)
Honda CB650R (2019–2025+)
Honda CBR650R (2019–2025+)
Includes:
TIG-welded stainless headers
Stainless link pipe
Shorty muffler
Springs, fasteners, mounting bracket
Removable dB killer insert
Optional Quietcore Baffle:
An additional insert for serious volume reduction, ideal for roadworthy inspections, blue slips, or TUV compliance.
Our CB(R)650R Shorty Exhaust System is available in two variants to suit both standard and Euro 5+ models.
If your bike is a Euro 5+ model, it will have two O₂ sensors connected to the factory exhaust. Please confirm your setup before ordering and select the correct variant from the dropdown.
How to check:
For 2024 models and onwards, look underneath your stock exhaust system, if you see two oxygen sensors threaded in, your bike requires the Euro 5+ compatible version. If there’s only one, select the standard version.
Need help confirming your bike’s setup? Flick us an email or DM with a photo of your factory exhaust, we’re happy to help.
Install Time: ~1–1.5 hours
Tools Needed: HEX set, sockets, wrenches, basic hand tools